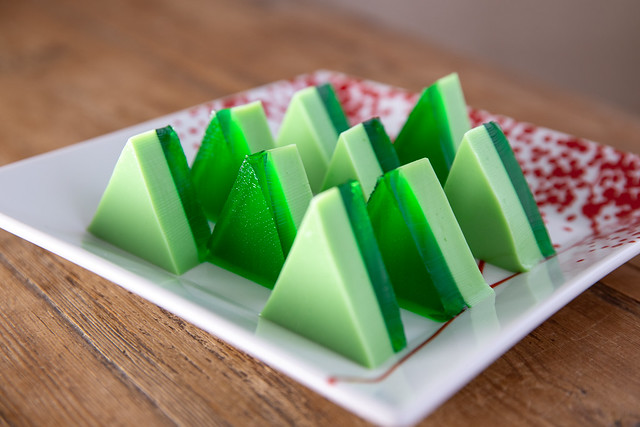
Lime Jell-O Christmas Trees
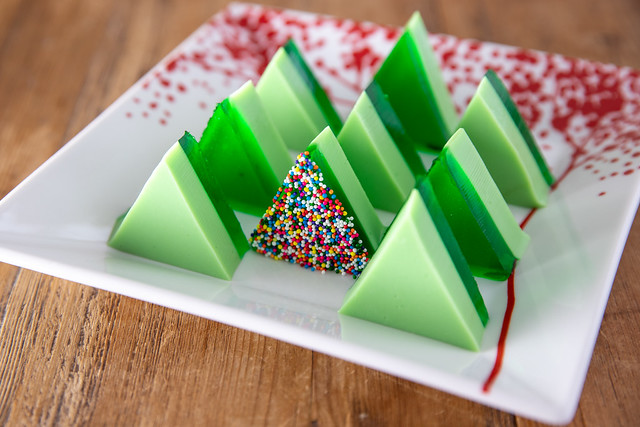
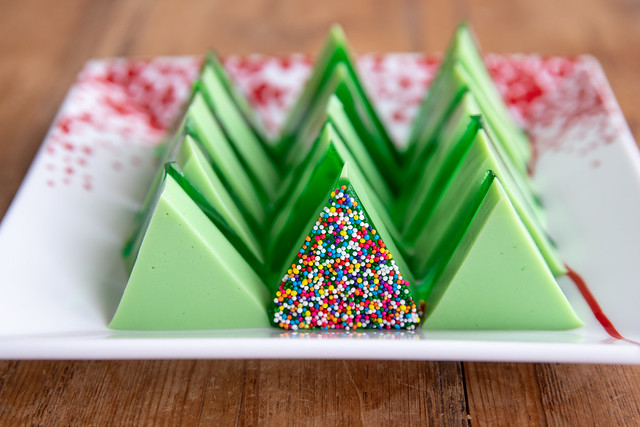
Jell-O Christmas Trees are easy to make, fun to eat, and super pretty! I just like all things Jello! This is two simple layers of Jell-O, one mixed with a can of evaporated milk, and cut into triangles. If you want, you can add some sprinkles right before serving.
I've had this recipe in my "To Make" files for years...so happy to finally make it! I can image doing this for many holidays - pinkish and reds for Valentines Day, Blue and Blue for a Dodgers game, pastel colors for Easter, and more!
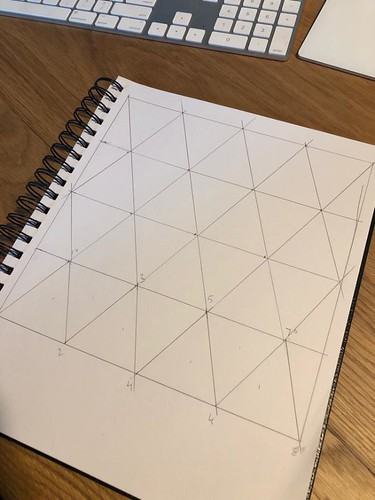 Thanks for Susan for helping me figure out how to cut these into 7 equal trees per row, with leftover scraps. Thanks to my friend JustJenn who came up with a plan that doesn't have leftover pieces. (Yes, I sent a group text as I was making this because my brain was dead and I couldn't figure it out... Yay friends!) Susan even broke out the ruler.
If you add sprinkles, do that right before you serve them...the sprinkles can run. And I tried random red and green sprinkles and it was ugly (see photo of the color running after sitting out for less than 30 minutes). I prefer the Jell-O without sprinkles because the sprinkles add a lot of crunch and I like a smooth Jello.
Merry Christmas! ~ mary
Merry Christmas! ~ mary
Jell-O Christmas Trees
Original Recipe from Jell-O: https://www.kraftrecipes.com/recipe/138513/christmas-tree-jigglers
Ingredients:
- Boiling water (total of 2 cups, divided)
- 1 can (5 oz.) evaporated milk (Yo, it's not Sweetened Condensed milk like I use in lots of my Jell-O recipes. Be sure to get Evaporated Milk) (If possible, have it refrigerated before making the Jell-O)
- 2 large packages of 6 ounces each, or 4 small packages of 3 ounces each - Jell-O, Lime flavor (You need a total of 12 ounces of Lime Jello)
Prep: Lightly spray an 8 x 8 inch pan. Wipe out any excess spray. Set aside.
Plain Jell-O Layer:
- Pour 6 ounces of Lime Jell-O (1 big package or 2 small packages) into a medium bowl. Add 1 1/3 cups boiling water into the bowl, and stir until completely dissolved (2-3 minutes).
- Pour Jell-O into 8 x 8 pan. (I used my Magic Line 8 x 8 x 2 pan)
- Refrigerate for 25 to 30 minutes, until set but not fully firm.
Milky Jell-O Layer:
- After the Plain Jell-O Layer has been in the refrigerator for 15 - 20 minutes, start on the Milky Jell-O Layer.
- Pour 6 ounces of Lime Jell-O (1 big package or 2 small packages) into a medium bowl. Add 2/3 cup boiling water into the bowl, and stir until completely dissolved (2-3 minutes).
- Stir in evaporated milk (shake well before opening can).
- Refrigerate mixture until slightly thickened (about 15 minutes). Pour over the plain Jell-O layer and return to the refrigerator
- Let set at least 4 hour or overnight.
Cutting:
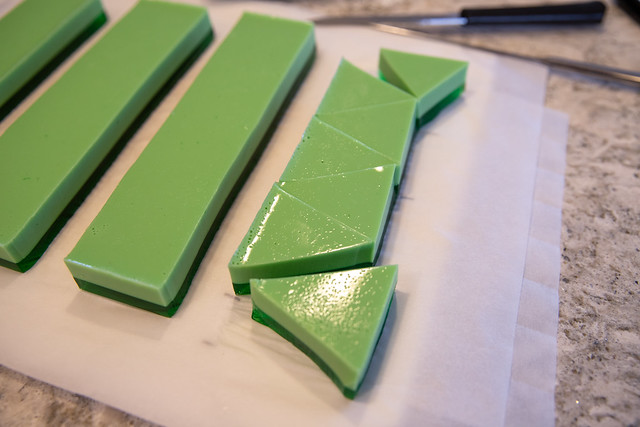
- Unmold the Jell-O onto a cutting board. If the whole thing doesn't come out easily, you can cut into 4 equal rows. Then carefully pull out each row onto the cutting board. (See my photos above)
- Cut each row into 7 alternating equilateral triangles (you'll have 2 scrap pieces at the end). See photos and my friend Susan's drawing - thanks Susan! (Yes, that's the same Susan from Swedish Bread fame - always helping me out!). I made a cut line template on parchment paper and placed that under the Jell-O.
Optional:
- Dip one side of the Jell-O piece in sprinkles.
- Important note: Press into sprinkles right before serving...they will eventually start to bleed.
- Only use sprinkles that are coated.
- I prefer it without sprinkles because the sprinkles add a lot of crunch and I like a smooth Jell-O.
Amazon links (affiliate links - if you buy stuff, I get a few cents without any cost to you):


No comments:
Post a Comment