Fresh Strawberry Daifuku Mochi

Sunday, September 22, 2019

Strawberries, Sweetened Red Beans, and Mochi = YUMMY

Hello! I've always wanted to make Fresh Strawberry Daifuku Mochi and finally made it! When I posted photos to Instagram, several people asked for the recipe. I felt I couldn't just give you the recipe because there's some technique involved. So, here is a video of me making Strawberry Daifuku Mochi. It's a fresh strawberry covered with anko (sweetened red Azuki beans, smooth texture), covered with mochi made with Koda Farms Mochiko sweet rice flour.

This video uses the microwave method. You can search the interwebs for a steamed method. I adapted recipes and techniques from Just One Cookbook, Bon Appetit, and my 40+ years of mochi making experience with my family. Also, I worked in a mochi & manju shop while in high school (Sakura-ya in Gardena, CA - um, seriously the best mochi in Southern California), and I helped make mochi during their busy New Year's holiday season.


Hints for success:

  • Work fast - mochi needs to be hot/very warm when you form it. That's why this is a small batch. 
  • Make sure your hands have potato starch on them to prevent sticking when working with hot mochi. You know what sucks and could hurt you? Having sticky HOT mochi stuck to your hands. It's a pain. Thus, if children are helping, you need to be careful. 
  • If you screw up microwaving the mochi, just make another batch. You are using a small amount of ingredients and your box of Mochiko will give you several batches. (I overcooked it once and had to start over).
  • Some of the video is sped up so I'm not working that fast. Please know that I've been making mochi and baking for a long time. I can hold hot mochi in my hands pretty easily. I think forming mochi might be one of those "harder than it looks on the video" techniques. But keep practicing and you'll get it! And no matter what it looks like, it's delicious! 
  • I've only ever used Koda Farms Mochiko sweet rice flour made with short-grain glutinous rice. This California family business has been making Mochiko for the Japanese American community forever. Support them and follow them on IG. Also, "sweet" rice doesn't mean any sweetener is added, it refers to the type of rice. (You can't use Bob's rice flour because that is made with medium and long grain rice. You need the short-grain rice flour... just get Koda Farms and you'll be good.)
  • This isn't the only way to make mochi. The interwebs has lots of videos and recipes. The ratio of mochi, anko, and strawberry varies. 
  • FYI - I can't make this low-carb and have never substituted real, granulated sugar for other sugars. Koda Farms Mochiko is rice flour and gluten-free. Anko (sweetened Azuki beans) is usually gluten-free but read labels carefully.
  • I have seen people substitute corn starch for potato starch and I think that'll work. You brush off most of the powder.


Ingredients:
3/4 cup Koda Farms Mochiko rice flour (link on Amazon) (Hey, I noticed that I have the wrong amount on the video. The correct amount is 3/4 cup Mochiko).
3 Tablespoons granulated sugar
1/4 cup cold water
Anko (sweetened azuki red beans), smooth (comes in smooth and rough texture. I prefer smooth for mochi) (link on Amazon)
6-8 small or medium fresh strawberries

Preparation (see video for details):
  1. Cover strawberries with a thin layer of anko. Refrigerate until ready to use.
  2. In a microwave safe bowl, mix mochiko and sugar. Add water and stir until smooth and well combined.
  3. Cover with plastic wrap and microwave 1 minute. Remove and stir with spatula.
  4. Return covered dish to the microwave for 30 seconds. Remove and stir.
  5. Microwave another 30 seconds and stir.
  6. Finally, microwave another 30 seconds and stir. Mochi needs to be smooth and sticky.
  7. Microwave times may vary because all microwaves are different.
  8. Spread potato starch on work space, and plop mochi on the potato starch.
  9. Cut small pieces of mochi and form into a circle.
  10. Wrap anko covered strawberries with mochi, placing seal at the bottom.


* I am part of Amazon Affiliates program so I can earn a few pennies if you purchase something - at no cost to you.

Music in video by Ben Sound. Thank you!

  
Pin It!
Funfetti or Confetti Cookies

Sunday, February 24, 2019


Funfetti / Confetti Cookies

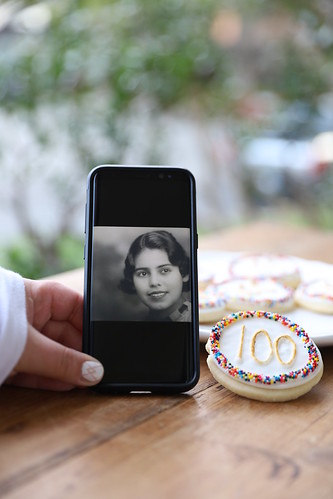
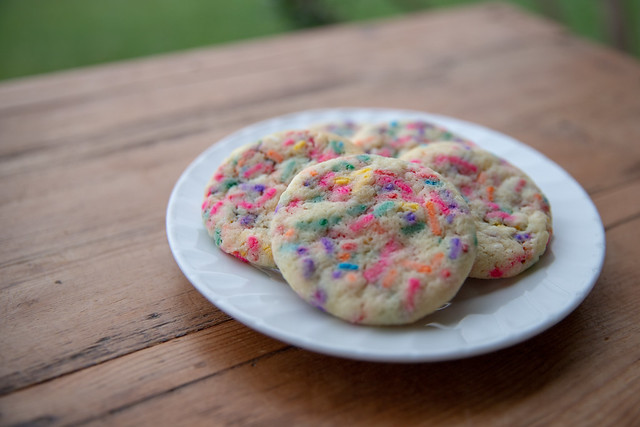
Funfetti is FUN - I mean, it's in the name! My Bonus Kids Alison, Rosie, and Emily came to Los Angeles to celebrate their grandmother's 100th birthday recently. Pastry Chef Rosie came to my house to bake the desserts, and she made these fun and delicious cookies. Lucky for me (and you), she left her recipe and I made a batch for work.

  Rosie-Grandma-100_2084 Rosie-Confetti-Cookie
First, here is Rosie's beautiful grandma and the cookies she made at my house for the party. (If you are in Western Massachusetts, visit Hunt + Hart Cafe + Bakery in Huntington, MA and eat a delicious lunch or dinner made by my friends Helen, Alison, and Rosie!)

01-2019_01_Funfetti-Cookies
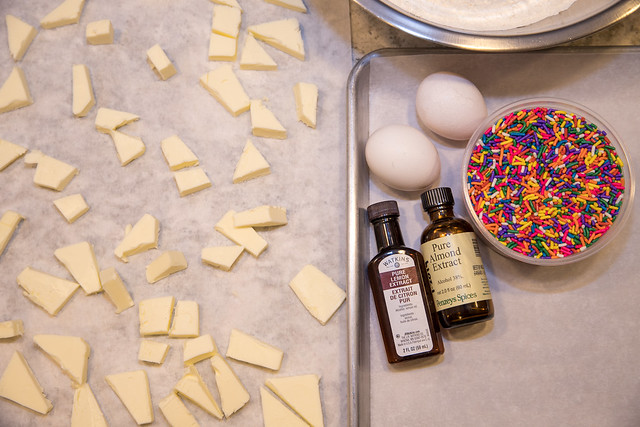
Here are the ingredients. In order to soften the butter quickly, chop and lay on a piece of parchment.

02-2019_01_Funfetti-Cookies 03-2019_01_Funfetti-Cookies
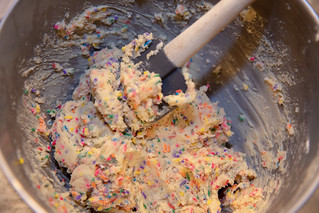
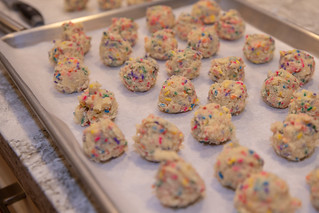
After making the dough, scoop cookies. My scoops were a bit wonky on this batch so I took a few minutes to round them in my hands before squashing them a bit. (see photo below)

05-2019_01_Funfetti-Cookies
Freeze the squished (yes, I'm sure that is a baking term) cookies for at least 2 hours before baking. I got 47 cookies from one batch of dough.

07-2019_01_Funfetti-Cookies
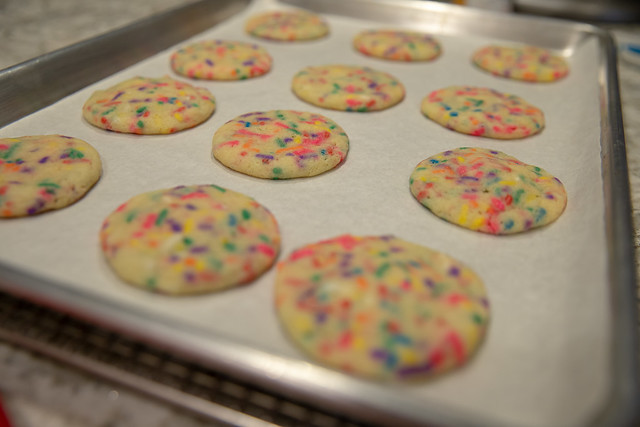
The cookies spread a bit and have slight cracking on top. These are small cookies. Rosie makes them about double the size.

08-2019_01_Funfetti-Cookies
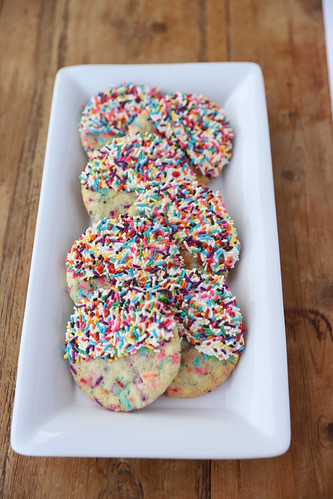
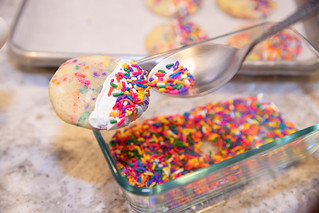
Spread a thin layer of melted Candy Melts (we bought ours at Michael's) with an off-set spatula. Have sprinkles ready. You need to work fast because the Candy Melts harden quickly (if it does, just re-melt in the microwave).

12-2019_01_Funfetti-Cookies 13-2019_01_Funfetti-Cookies
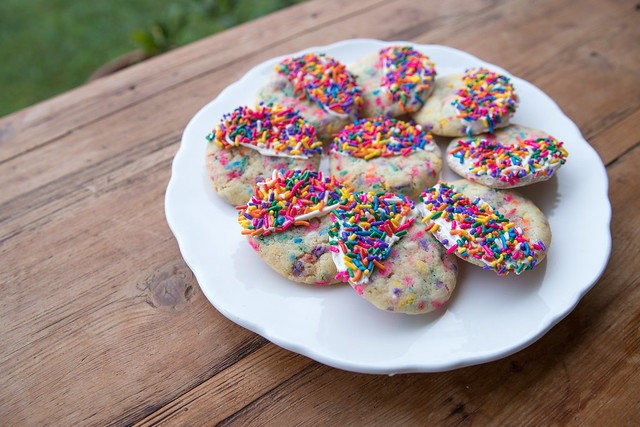
You don't need to cover the bottom of the cookie. Coat half the cookie with reserved sprinkles.

18-2019_01_Funfetti-Cookies
You can adjust the sprinkle colors for baby showers, team sports, holidays, and more. I look forward to making UCLA cookies for a big game!

21-2019_01_Funfetti-Cookies
You can skip the top coating altogether and let the colored sprinkles shine through.

Thanks Rosie for a great recipe! Thanks Alison, Emily, and Rosie for being the best bonus kids ever! Love, your bonus mom!


Funfetti or Confetti Cookies Recipe

Ingredients:
2 sticks (8 ounces) unsalted butter, softened
1 1/2 cup (300 grams) granulated sugar
2 large eggs
1 Tablespoon lemon extract
1 Tablespoon almond extract
3 cups (420 grams) all-purpose flour
1 Tablespoon plus 1 teaspoon cornstarch (that worked out to 10 grams for me)
1 1/2 teaspoons baking soda
1 cup rainbow sprinkles plus more for decoration

Candy Melts ("white" - I think that's vanilla)

Instructions
Prep: In a medium bowl, measure and whisk together flour, cornstarch, and baking soda.
1. In a stand mixer fitted with a paddle, cream butter and sugar.
2. Add egg and extracts until light and fluffy.
3. Scrape down the sides of the bowl.
4. On low speed add in flour, cornstarch, baking soda mixture until just combined, a minute or less.
5. Add sprinkles and beat until just mixed in - or you can do this part my hand.
6. Scoop dough rounds onto parchment paper. Flatten a bit with the palm of your hand.
7. Freeze dough until no longer soft, at least 2 hours. (I froze them overnight).

Baking
8. Preheat oven to 350 degrees F. (I have also baked at 325 F on Convection Bake setting).
9. Place cookies on parchment lined cookie sheets, 2 inches apart as they will spread. Bake straight from the freezer.
10. Bake times depends on size of cookie and frozen state - from 8 minutes to 15 minutes. It's a good idea to bake just one or two to determine the best baking time. Mine took about 13 minutes from frozen solid. The cookie will crack on top and the edges should not be brown - they may look underbaked.
11. Let cook completely before frosting.

Decorating
12. Melt candy melts as directed on package.
13. With an off-set spatula, spread a thin layer of candy melt on half the cookie and sides. Leave the bottom of the cookie bare.
14. Spread sprinkles on the cookie.

Options: You can skip the palm oil in the candy melts and use white chocolate to coat. You can also skip the topping of sprinkles altogether.
Options: Replace almond extract with vanilla extract.

Disclosure: Links to Amazon products are affiliate links. I'll get a few cents if you buy something - there is no cost to you. 
Pin It!

Feel-Better Chicken and Rice Soup with Sweet Potato - Bon Appetit

Wednesday, January 16, 2019

2019_01-Chicken-Soup-Bon-Appetit-6

Bon Appetit's Feel-Better Chicken and Rice Soup with Sweet Potatoes

It's been cold. It's be raining. And it's time for soup!

I was down a YouTube rabbit hole recently and started watching a bunch of Bon Appetit videos. I love them - filmed in the test kitchen, these short videos have chefs with great personalities. My favorite series is Claire Saffitz making gourmet junk food like Oreos, Skittles, Instant Ramen (and bickers with Brad in the kitchen). Anyway, my second favorite is Andy Baraghani. He brings his own rice to make a Persian dish and made this delicious soup (watch the video)

2019_01-Chicken-Soup-Bon-Appetit-1
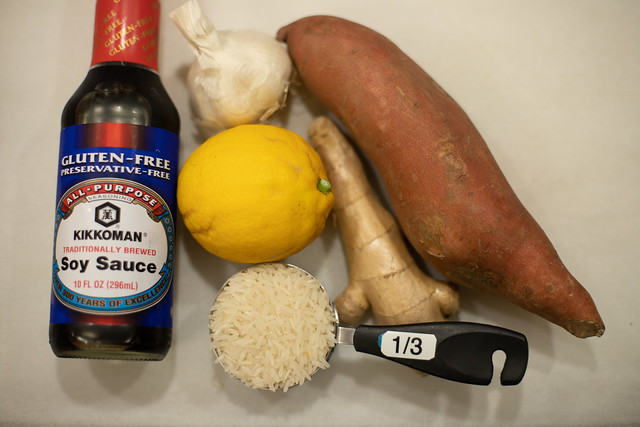
Using the most basic of ingredients, you can make and serve this soup in an hour. And that's a Meyer lemon from my mom's tree.

2019_01-Chicken-Soup-Bon-Appetit-3  2019_01-Chicken-Soup-Bon-Appetit-2
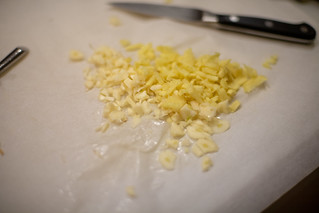
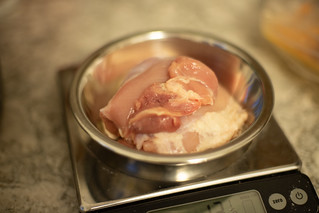
There are 4 garlic cloves and 2 inches of ginger. Man, I love ginger in soup. I used two-ish chicken thighs.

2019_01-Chicken-Soup-Bon-Appetit-4
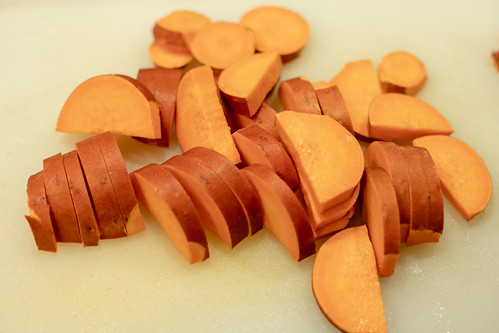
One large sweet potato, with skin on, makes for a yummy change from a plain potato and the color is awesome.

2019_01-Chicken-Soup-Bon-Appetit-5
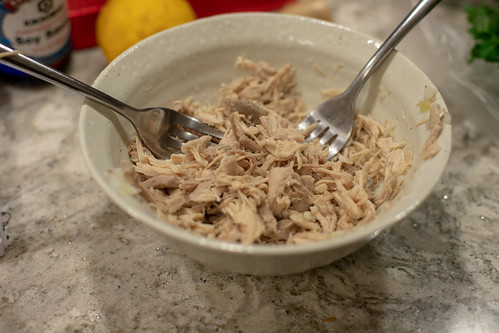
Before serving, shred the chicken thighs with two forks. Super duper easy soup!

2019_01-Chicken-Soup-Bon-Appetit-9
Right before serving, a couple tablespoons of lemon juice and soy sauce are added. Topped with cilantro, it's way delicious. I served this to a friend who liked it, and another friend made it and loved it. I've made it twice in 2019 and we're only at January 16 so it's hella good. I hope you make this!

Bon Appetit Feel-Better Chicken and Rice Soup

Chicken with Rice and Sweet Potato

Part of the Bon Appetit New Year's Healthyish series

Bon Appetit recipe link: https://www.bonappetit.com/recipe/chicken-rice-soup

3/4 pound skinless, boneless chicken thighs (I used two plus a little thighs)
1/3 cup jasmine rice, rinsed (rinse until water runs clear)
4 garlic cloves, thinly sliced
2" piece fresh ginger, peeled, thinly sliced
1/2 t kosher salt
2 small sweet potatoes, unpeeled, cut into ½"-thick rounds (I used one large sweet potato)
2 TBSP fresh lemon juice (I used Meyer lemon juice)
2 TBSP soy sauce
½ bunch cilantro, coarsely chopped
Freshly ground black pepper

1. In a large saucepan, bring chicken, rice, garlic, ginger, salt, and 5 cups water to boil.
2. Reduce heat to medium-low and simmer, uncovered for 10-12 minutes, until chicken is firm
3. Add sweet potatoes to pan and cook over medium-low heat, uncovered and stirring occasionally, until soup is thickened and potatoes and rice are tender, 15–20 minutes longer.
4. Remove chicken and shred. Return the chicken to the pot.
5. Add lemon juice and soy sauce. Add salt and pepper to taste.
6. Top soup with chopped cilantro

Makes enough for 2 large servings with leftovers.

Recipe by Andy Baraghani. Video with his amazing no-look chopping (I would be in the ER after trying that): https://www.youtube.com/watch?v=yj2j_K8c7XE

Join Andy Baraghani in the Bon Appétit Test Kitchen
Pin It!

Jell-O Christmas Trees

Monday, December 24, 2018

017-2018_12_Jello-Christmas-Trees
Lime Jell-O Christmas Trees

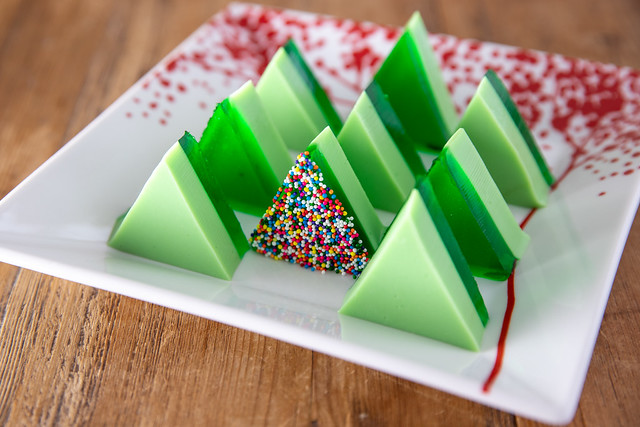
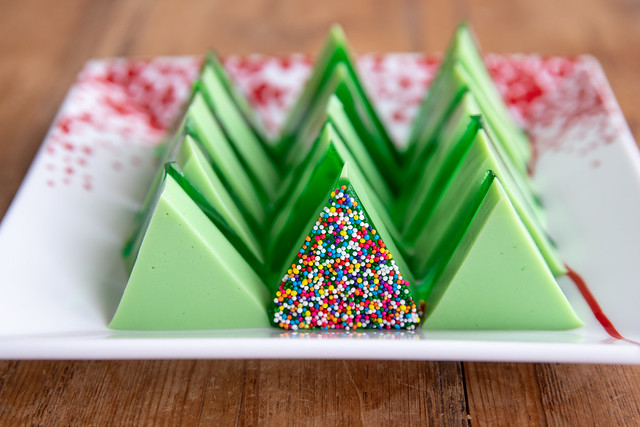
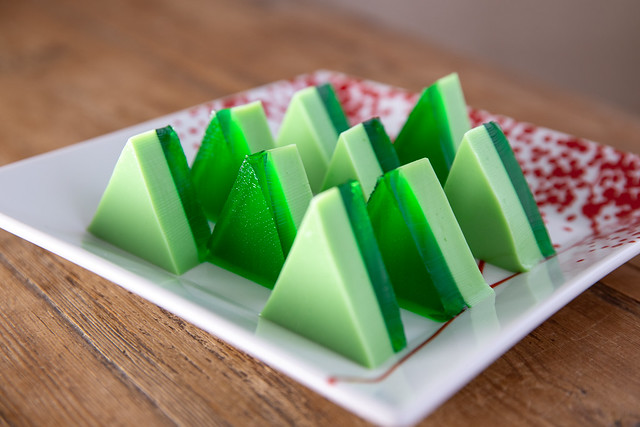
Jell-O Christmas Trees are easy to make, fun to eat, and super pretty! I just like all things Jello! This is two simple layers of Jell-O, one mixed with a can of evaporated milk, and cut into triangles. If you want, you can add some sprinkles right before serving. 

012-2018_12_Jello-Christmas-Trees
I've had this recipe in my "To Make" files for years...so happy to finally make it! I can image doing this for many holidays - pinkish and reds for Valentines Day, Blue and Blue for a Dodgers game, pastel colors for Easter, and more! 

004-2018_12_Jello-Christmas-Trees

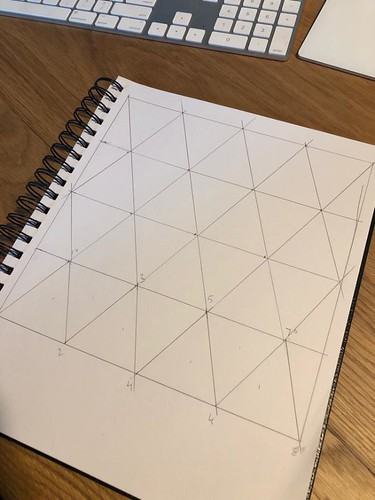
jello-trees-susan-cut-linesThanks for Susan for helping me figure out how to cut these into 7 equal trees per row, with leftover scraps. Thanks to my friend JustJenn who came up with a plan that doesn't have leftover pieces. (Yes, I sent a group text as I was making this because my brain was dead and I couldn't figure it out... Yay friends!) Susan even broke out the ruler. 

If you add sprinkles, do that right before you serve them...the sprinkles can run. And I tried random red and green sprinkles and it was ugly (see photo of the color running after sitting out for less than 30 minutes). I prefer the Jell-O without sprinkles because the sprinkles add a lot of crunch and I like a smooth Jello.

Merry Christmas! ~ mary


Jell-O Christmas Trees
Original Recipe from Jell-O: https://www.kraftrecipes.com/recipe/138513/christmas-tree-jigglers

Ingredients:
- Boiling water (total of 2 cups, divided)
- 1 can (5 oz.) evaporated milk (Yo, it's not Sweetened Condensed milk like I use in lots of my Jell-O recipes. Be sure to get Evaporated Milk) (If possible, have it refrigerated before making the Jell-O)
- 2 large packages of 6 ounces each, or 4 small packages of 3 ounces each - Jell-O, Lime flavor (You need a total of 12 ounces of Lime Jello)


Prep: Lightly spray an 8 x 8 inch pan. Wipe out any excess spray. Set aside.

Plain Jell-O Layer:

  • Pour 6 ounces of Lime Jell-O (1 big package or 2 small packages) into a medium bowl. Add 1 1/3 cups boiling water into the bowl, and stir until completely dissolved (2-3 minutes). 
  • Pour Jell-O into 8 x 8 pan. (I used my Magic Line 8 x 8 x 2 pan)
  • Refrigerate for 25 to 30 minutes, until set but not fully firm.

Milky Jell-O Layer:

  • After the Plain Jell-O Layer has been in the refrigerator for 15 - 20 minutes, start on the Milky Jell-O Layer. 
  • Pour 6 ounces of Lime Jell-O (1 big package or 2 small packages) into a medium bowl. Add 2/3 cup boiling water into the bowl, and stir until completely dissolved (2-3 minutes). 
  • Stir in evaporated milk (shake well before opening can).
  • Refrigerate mixture until slightly thickened (about 15 minutes). Pour over the plain Jell-O layer and return to the refrigerator
  • Let set at least 4 hour or overnight.

Cutting:

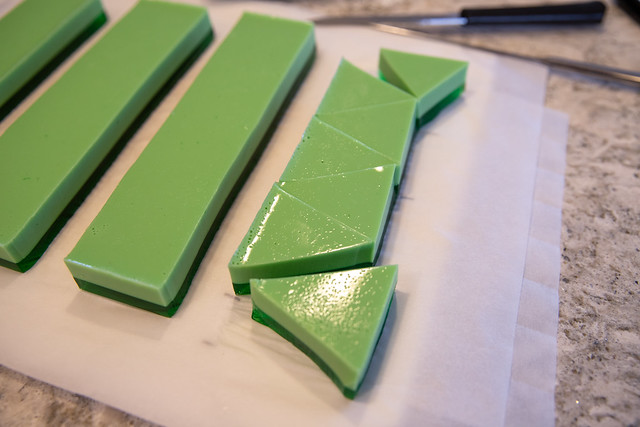
  • Unmold the Jell-O onto a cutting board. If the whole thing doesn't come out easily, you can cut into 4 equal rows. Then carefully pull out each row onto the cutting board. (See my photos above)
  • Cut each row into 7 alternating equilateral triangles (you'll have 2 scrap pieces at the end). See photos and my friend Susan's drawing - thanks Susan! (Yes, that's the same Susan from Swedish Bread fame - always helping me out!). I made a cut line template on parchment paper and placed that under the Jell-O. 

018-2018_12_Jello-Christmas-Trees
Optional:

  • Dip one side of the Jell-O piece in sprinkles. 
  • Important note: Press into sprinkles right before serving...they will eventually start to bleed.
  • Only use sprinkles that are coated. 
  • I prefer it without sprinkles because the sprinkles add a lot of crunch and I like a smooth Jell-O.

011-2018_12_Jello-Christmas-Trees

Amazon links (affiliate links - if you buy stuff, I get a few cents without any cost to you):

Pin It!

Swedish Cinnamon Bread (Kanellängd) with Swedish Pearl Sugar

Sunday, December 16, 2018

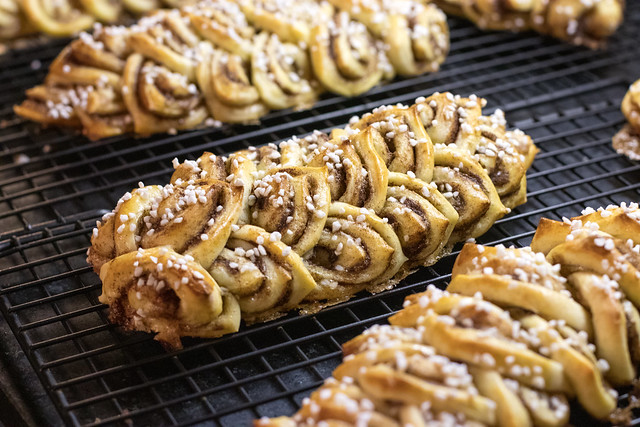
2018_1215_Swedish-Bread-Pearl-Sugar-27
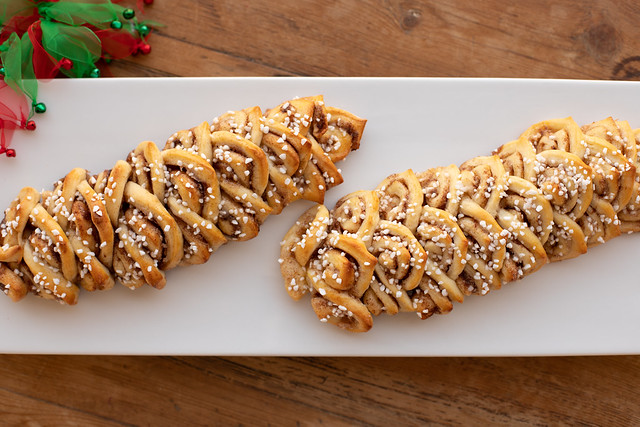
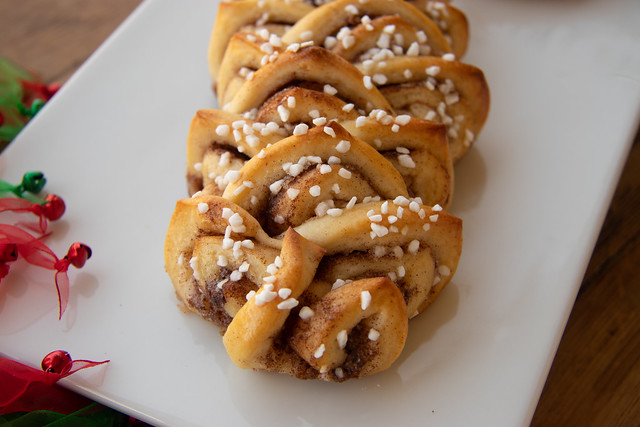
Kanellängd ~ Swedish Bread with Cinnamon and Pearl Sugar

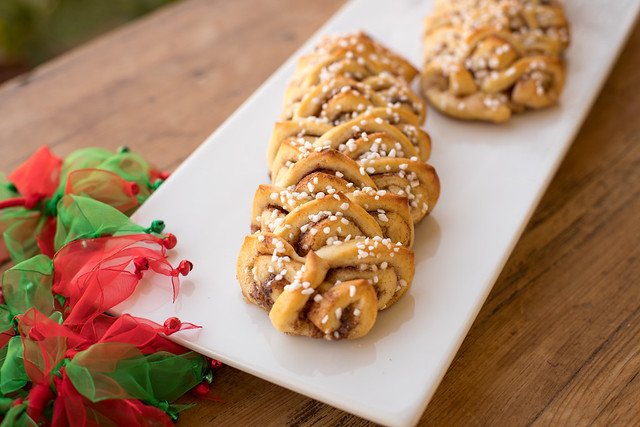
Kanellängd or Swedish Bread topped with Swedish Pearl Sugar is one of my favorite treats of the holiday season. My friend Susan makes loaves of this delicious bread, and I always try to remain a permanent friend so I'm on the bread list. Ha ha. We've always wanted to get together to bake this super pretty bread, and 2018 was finally the year!

This recipe is really special - Susan's mother-in-law brought her recipe from Sweden when she immigrated to America. Susan's husband Rick remembers making bread every holiday season - this was before the ubiquitous Kitchen Aid mixer with dough hook so he remembers lots of mixing and kneading. I found recipes online and some have cinnamon and cardamom. But Rick's mom didn't like cardamom so that got nixed. I always love seeing how a traditional recipe is adapted by each family or generation.

2018_1215_Swedish-Bread-Pearl-Sugar-28
Aren't they sooooo pretty!?!? And they are just as delicious!!

2018_1215_Swedish-Bread-Pearl-Sugar-2
The recipe calls for a mix of Swedish and US measurements - isn't that a true immigrant recipe? Rick's mom had her own deciliter measuring cup (100 milliliters = 1 deciliter) that Susan & Rick continue to use to this day. Do you have inherited cooking tools that you treasure?

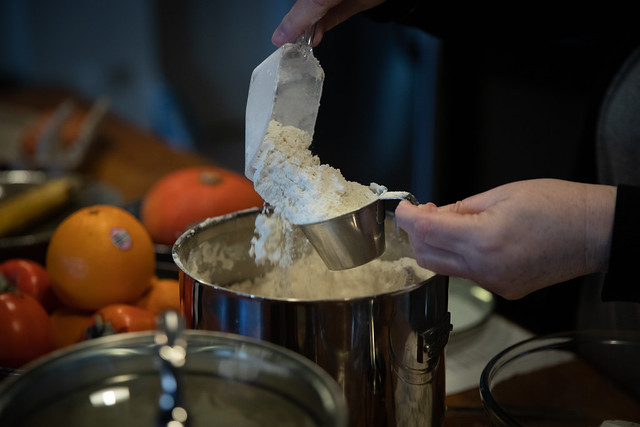
This dough is a sweet dough made with all-purpose flour, whole milk, butter, sugar, eggs, yeast, and a little salt.

2018_1215_Swedish-Bread-Pearl-Sugar-4
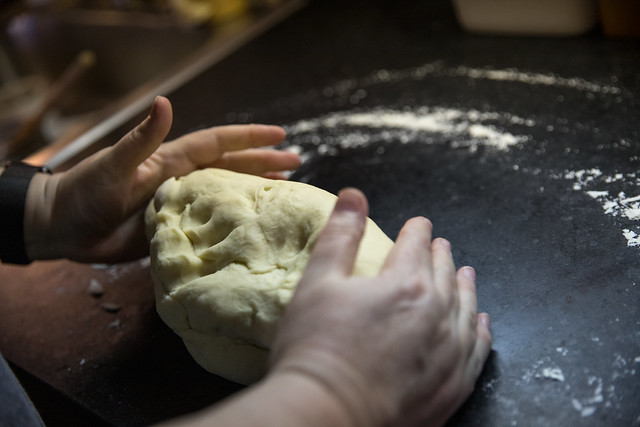
Dough! Kneading a bit before setting it aside to rise!

2018_1215_Swedish-Bread-Pearl-Sugar-10
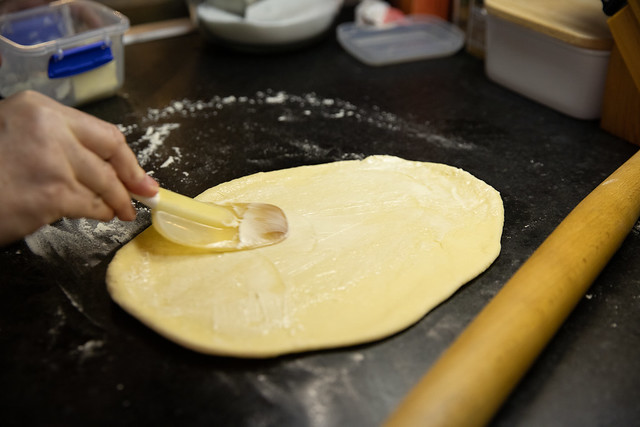
After an hour, the dough was punched down, kneaded, and divided into 8 equal pieces (using a scale is very handy). Then each piece is rolled out into a rectangle. Brush liberally with softened butter.

2018_1215_Swedish-Bread-Pearl-Sugar-11
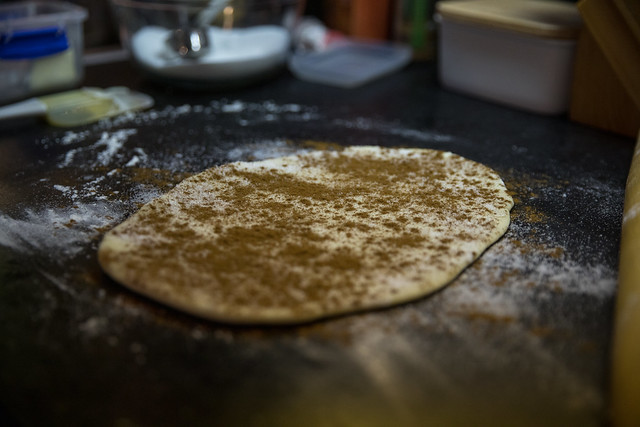
Sprinkle with sugar and cinnamon.

2018_1215_Swedish-Bread-Pearl-Sugar-6
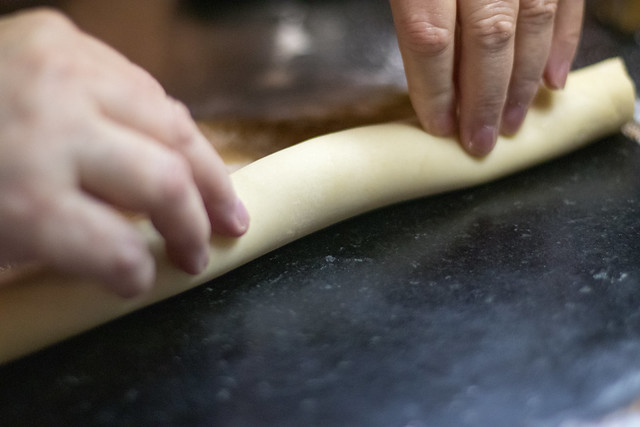
Roll the long end as tight as you can.

2018_1215_Swedish-Bread-Pearl-Sugar-7
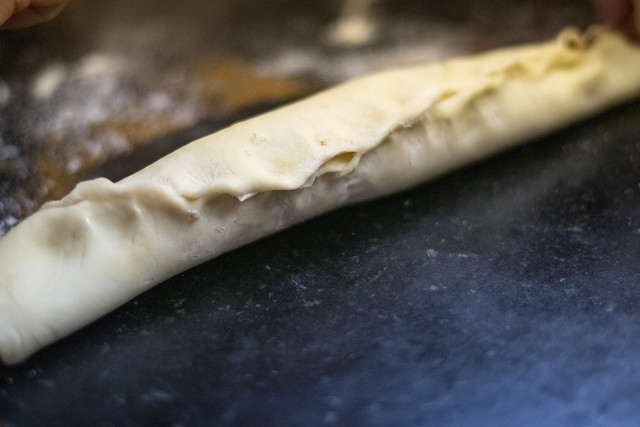
Pinch seal as best you can. Place seam side down on the baking sheet.

2018_1215_Swedish-Bread-Pearl-Sugar-8
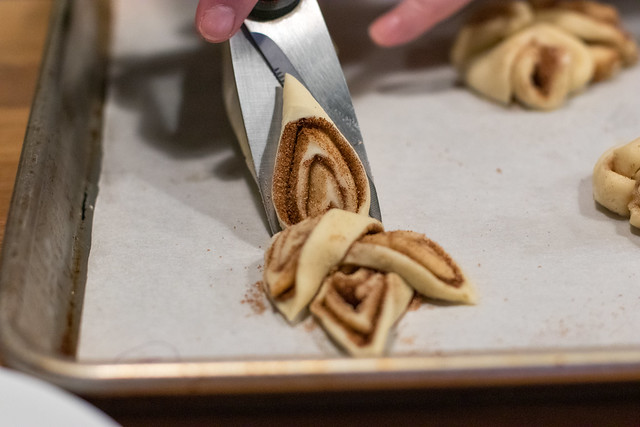
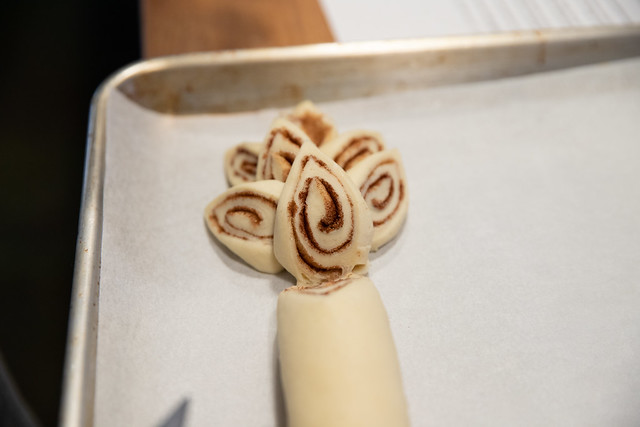
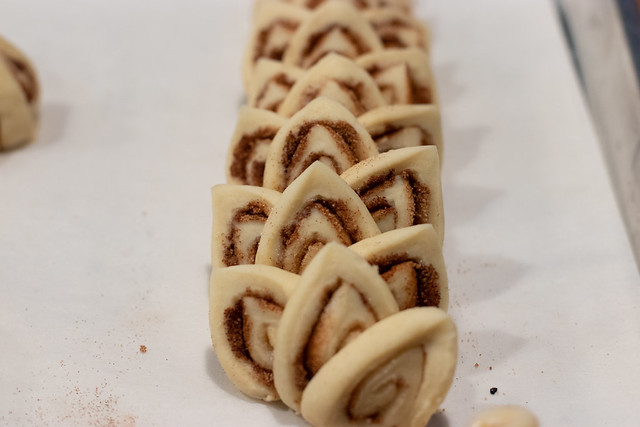
Okay. Here's the fun part. Using kitchen shears, cut sections of the log. Cut as close to the bottom of the log as possible. Fold over the just cut section in the following pattern: Center, Right, Left or Center, Left, Right - just be consistent. It's a good idea to pinch the top of each leaf so it keeps a nice pointy top.

2018_1215_Swedish-Bread-Pearl-Sugar-12
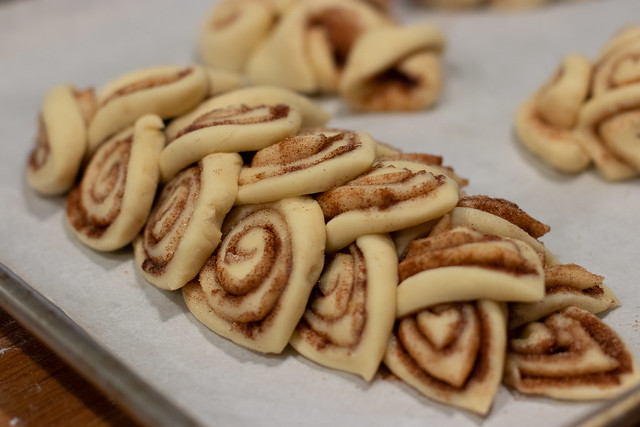
Here's another view of the log. Center, Right, Left, Center, Right, Left...until you are done. You will need to nudge the uncut log up on the tray as you proceed to make sure you don't severe the bottom as the log stretches (this will make more sense when you are doing it).

2018_1215_Swedish-Bread-Pearl-Sugar-13
By the way, when you get to the end, cut off any extra dough. Plop all those edges onto some part of the tray. Be sure to egg wash and Swedish pearl sugar those scraps and bake them off. Then you get to eat those scraps when they come out of the oven and save the loaf for your friends.

Cover the shaped loaves with a kitchen cloth and let rest for another hour to rise.

2018_1215_Swedish-Bread-Pearl-Sugar-17
After the second rise, preheat oven to 350 degrees F and get them ready to bake!

2018_1215_Swedish-Bread-Pearl-Sugar-19
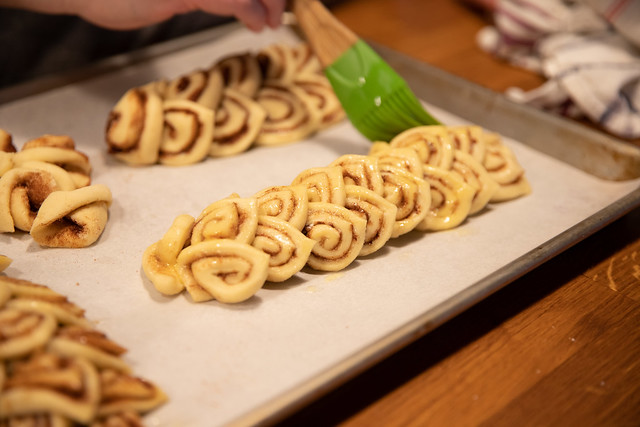
 Brush each loaf with an egg wash. Be sure to get all the nooks and crannies. (Oh, in the upper left corner you can see the scrape pile of deliciousness). We fit three loaves on a half-sheet tray.

2018_1215_Swedish-Bread-Pearl-Sugar-18
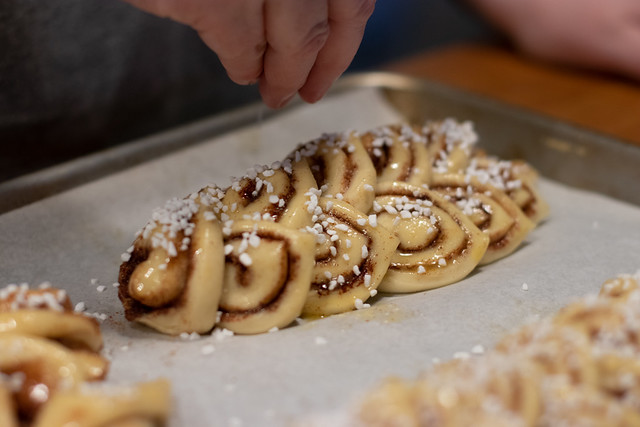
Top each loaf with a generous amount of pearl sugar. (Try not to eat all the pearl sugar out of the bag like I tried to do...it's so tasty and fun). Bake for 15-20 minutes at 350 degrees (length depends on the size of your loaf). Our 8 loaves baked for 19 minutes.

2018_1215_Swedish-Bread-Pearl-Sugar-22
Done! Yum! After 5 minutes, remove from tray and move onto cooling racks.


Kanellängd - Swedish Bread Recipe (via Rick's mom)

Bread dough:
5 dl (deciliter) whole milk = 2.11338 US cups
1 1/2 sticks butter (12 tablespoons)
2 dl sugar = .85 US cups
1 egg
1 tsp salt

2 packages active dry yeast
1 T granulated sugar
18-20 dl all-purpose flour = 7.6 to 8.45 US cups

Filling:
Softened butter (about a stick)
Sugar
Cinnamon

Topping:
Egg
Swedish pearl sugar (I purchased it at Surfas. Can be found on Amazon (affiliate link) or King Arthur)

Equipment needed:
Kitchen shears
Parchment paper
Baking sheets

Instructions:

Make the Bread Dough:
Heat milk, butter, sugar over low heat until butter is melted.

In a small bowl, lightly beat the egg. Temper the egg with a little of the milk mixture, then pour it into the milk mixture and mix well. Add salt. Set aside to cool a bit.

In another small bowl, combine yeast and 1 T of sugar. When the milk mixture is lukewarm, add 1/4 cup to bowl and whisk together. Set aside for yeast to start bubbling.

When the yeast is ready, start making the dough. In a stand mixer with the dough hook attachment, add 10 dl (about half the flour). Add the remaining milk mixture. Add the yeast mixture. Mix dough until combined and then add remaining flour, 1 dl at a time, until dough pulls away from the sides of bowl. Remove from bowl onto floured surface. Knead a few minutes then set aside in a bowl. Cover with clean kitchen towel and set in a warm area to rise for 1 hour.

After dough rises for an hour, punch down dough and knead about 50 times on a floured surface.

Divide dough to make loaves (we made 8 loaves so we used the scale to equally divide the dough.)

Shaping & Baking:
With a rolling pin, roll out dough into a rectangle on a floured surface. Spread softened button on the entire surface of the dough (we used about 1 T per loaf). Sprinkle sugar to cover the butter, then sprinkle cinnamon.

Roll the LONG side tightly and seal the edges by pinching the dough together. Place seam side down on a parchment lined baking sheet.

Using kitchen shears, cut the dough into 1/4" sections and shape (see photos above). Place cut sections in the pattern: Center, Left, Right, Center, Left, Right, and repeat.

Cover the loaves with a kitchen towel and place in warm area to rise another hour.

After an hour, preheat oven to 350 degrees F.

Brush loaves with a lightly beaten egg (no added water) and sprinkle with the delicious Swedish pearl sugar.

Bake at 350 degrees for 15-20 minutes. (Of course, it depends on how many loaves you make. When we made 8 loaves, they baked for 19 minutes.)

After 5 minutes, move loaves onto racks to cool. These are delicious warm from the oven. Can be kept at room temperature until you gift them to friends and family during the holiday season (or keep them for yourself to eat!) They are lovely warmed in the toaster over too. Enjoy!

2018_1215_Swedish-Bread-Pearl-Sugar-24
I made this! 

Thanks Susan and Rick for years of friendship and for sharing this wonderful tradition with me!

Merry Christmas! ~ Mary the Food Librarian


Notes:
Savor The Flavour has a recipe that includes cardamom and a orange glaze. They have the segments go right or left (we have right, left, and center) and they make one big log.

BBC Food has a video (with really interesting music) and they make two cuts (left and right) and one big log.
Pin It!

Brownie Crinkle Cookies (The Boy Who Bakes recipe)

Friday, December 7, 2018

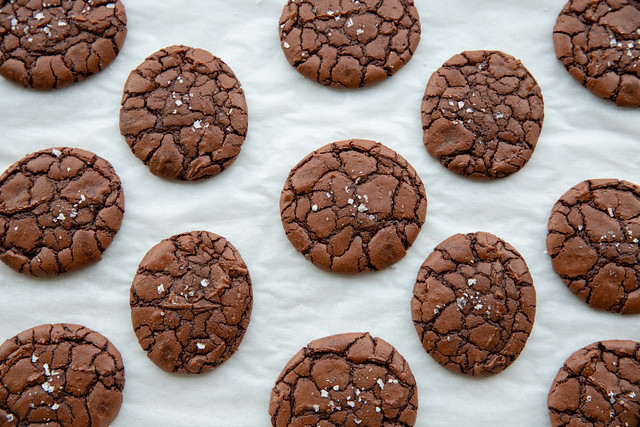
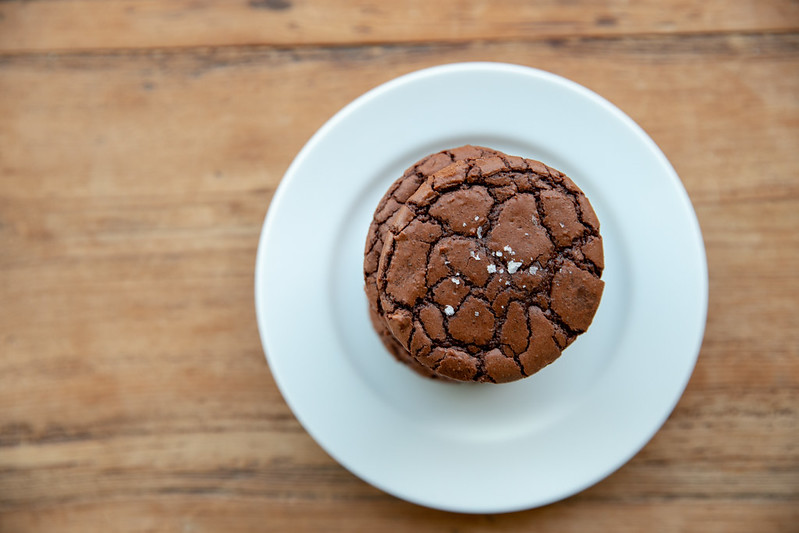
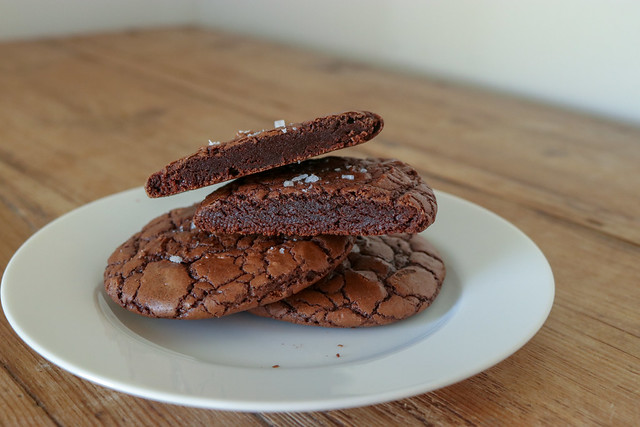
Brownie Crinkle Cookies on a plate

Brownie Crinkle Cookies from The Boy Who Bakes recipe

Do you have one hour? Then you have time to make these cookies! Really, they are super easy and fast. I can wake up super duper early and make them before work (and I leave home at 6 am). Sometimes, I don't have time to let them cool so I just lug the half-sheet pan into work. My co-workers don't mind. And I'm sure your friends won't mind too.

This recipe is from The Boy Who Bakes. I love Edd Kimber, cookbook author and winner of the BBC2's Great British Bake Off. He has engaging videos and fun content on Instagram. Earlier this year, he brought us heaven...in the form of a brownie cookie.

Baking these cookies is so much easier than baking brownies - you don't have to wait until the brownies are cool, cut them into squares, and place into cupcake liners. This is a brownie. In the shape of a drop cookie. Oh, did I mention there is sea salt? Yes there is.

I'm excited to come back to blogging with this recipe. I've been making these cookies All. The. Time. I would think colleagues would get sick of them...but apparently they have no trouble finishing them off. Let's go. - mary

Brownie Crinkle Cookies with Sea Salt | Food Librarian
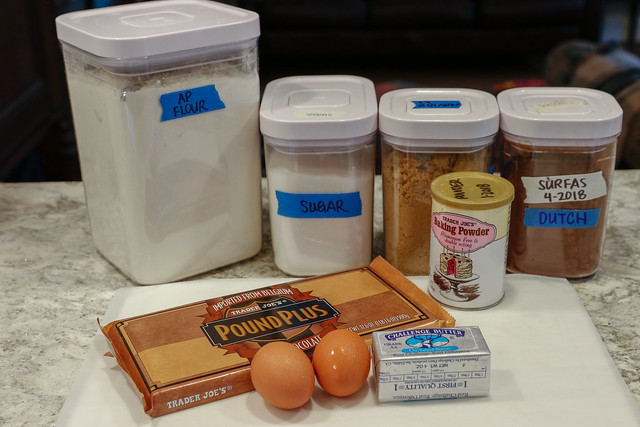
The Boy Who Bakes emphasizes this and I concur. You need GOOD ingredients for this to work. It has two types of chocolate: Dark chocolate and Dutch Cocoa. I use the Trader Joe's Belgium Dark Chocolate and Valhrona Dutch Cocoa (purchased at the new Surfas location in Los Angeles - so excited they are back!!)

The other thing that's key in this recipe is timing. You should mise en place your ingredients, preheat your oven, and have two parchment lined trays at the ready.

(The photos are from two different baking sessions in case they look slightly different.)

Brownie Crinkle Cookies with Sea Salt | Food LibrarianBrownie Crinkle Cookies with Sea Salt | Food Librarian
A few colleagues have said these are their favorite cookies and I should bring them to every meeting.

Brownie Crinkle Cookies with Sea Salt | Food Librarian
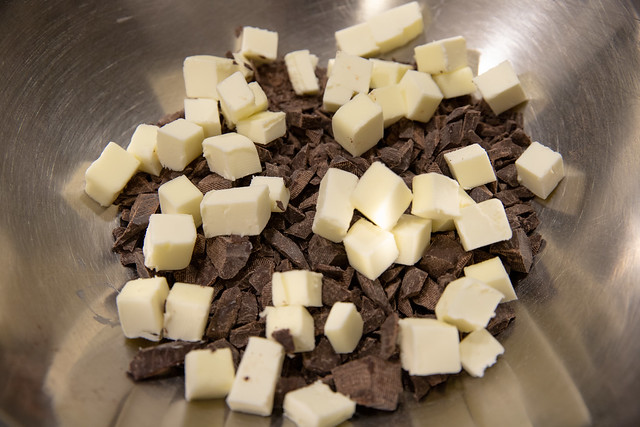
Process photos: Melt chopped chocolate and butter over double boiler.

Brownie Crinkle Cookies with Sea Salt | Food Librarian
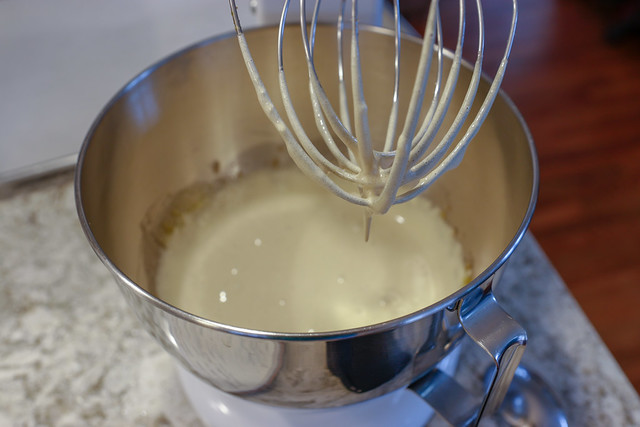
When the chocolate is melted, start the stand mixer containing the sugars and eggs. Beat for exactly 5 minutes.

Brownie Crinkle Cookies with Sea Salt | Food Librarian
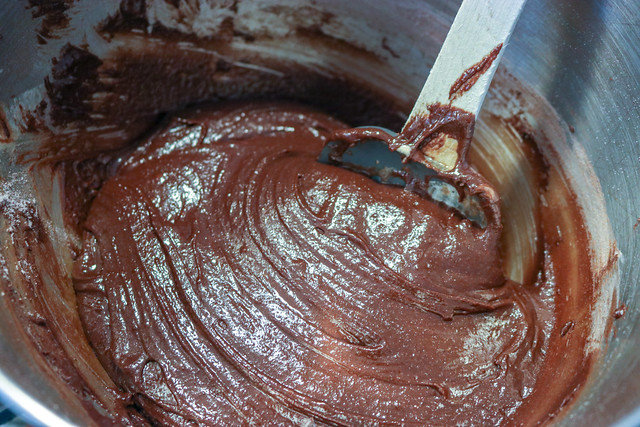
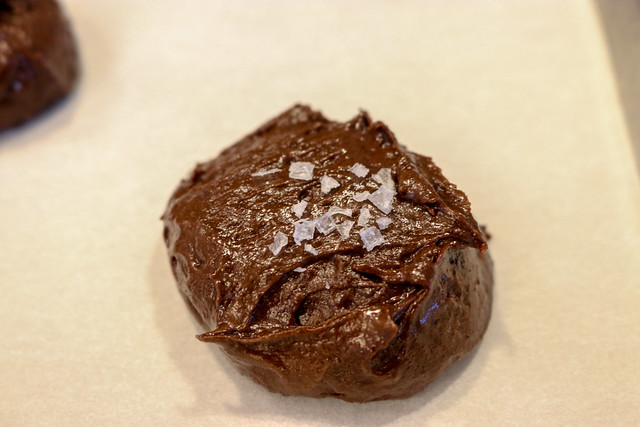
The final batter is thick and easily scooped into mounds.

Brownie Crinkle Cookies with Sea Salt | Food Librarian
Top with flaked sea salt.

Brownie Crinkle Cookies with Sea Salt | Food Librarian
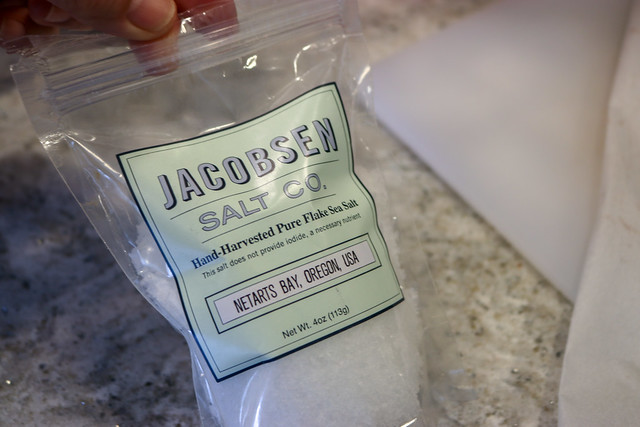
I use Jacobsen Salt Co. - Hand Harvested Pure Flake Sea Salt. It's really delicious salt. I even carry some around with me in a little tin - from Amazon (affiliate links)


Recipe: Brownie Crinkle Cookies
(adapted from The Boy Who Bakes)
200 g dark chocolate (around 65-70% cocoa solids), chopped - I use Trader Joe's Dark Chocolate pound bar
125 g (1 stick) unsalted butter, diced
150 g sugar (original recipe calls for caster sugar, but I use granulated sugar)
100 g light brown sugar
2 large eggs
130 g all-purpose flour
3 Tablespoon (about 18-20 grams) Dutch-processed cocoa powder (not natural) - I use Valhorna cocoa powder
1 tsp baking powder
1/4 tsp salt - I use kosher salt

Flaked sea salt for sprinkling - I used Jacobsen's

As the Boy Who Bakes stressed, timing is important. Be sure to have a preheated oven at 350 F ready to go, parchment lined sheet trays (I use 2 half-sheets), as well as all your ingredients scaled and ready.

1. Preheat oven to 350 degrees.
2a. Sift together dry ingredients (flour, cocoa, baking powder, and salt). Set aside.
2b. Using a double boiler, melt butter and chocolate, stirring occasionally. Remove from heat when melted.
3. As soon as the chocolate is melted, beat together the sugars (granulated and brown sugar) and eggs in a stand mixer with whisk attachment for 5 minutes (set a timer...you want 5 minutes).
4. Scrape down sides of mixture and add the melted chocolate & butter mixture. Beat for 30 seconds to 1 minute until combined.
5. Add the sifted dry ingredients all at once and mix just until combined. I usually stop early and finish folding with a spatula until blended. But hurry...you gotta get this into the oven.
6. Scoop with disher (cookie or ice cream scoop) so they are uniform in size. (Note: Boy Who Bakes makes them really big. He fits 6 on a tray and I get at least 12.) They do spread so don't crowd them on the tray.
7. Sprinkle some flaked sea salt on top of each cookie. (When I started I didn't put enough salt on each cookie, so don't be afraid).
8. Place in center of oven and bake for 12 minutes. They will develop a crinkled top and puff a bit. I bake with the tray in the center rack and only bake one tray at a time.
9. Remove from oven and let rest on the tray until they are cool. Because they are soft, don't move onto a cooling rack until they are cool.
10. Enjoy!

Link to original recipe:
http://www.theboywhobakes.co.uk/recipes/2018/3/29/j9cnerut0as1ec0fcdiawsc4usi7ss

Brownie Crinkle Cookies with Sea Salt | Food Librarian

Some products used and The Boy Who Bakes cookbooks (affiliate links to Amazon's program - if you buy something, I get a few cents to buy more ingredients, and it doesn't cost you anything)

        
Pin It!
Blog Widget by LinkWithin