Christmas Cool Whip Jello / Gelatin

Monday, December 22, 2014

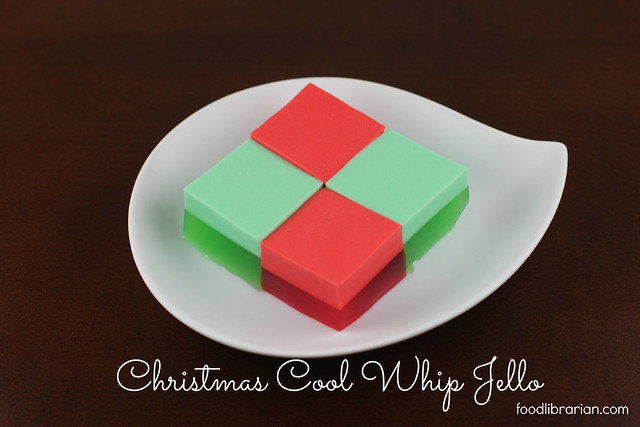
Christmas Cool Whip Jello

Hey, it's almost Christmas! How did that happen?

Anyway, I'm working until 6 pm on Christmas eve. If you are like me, you need a quick and easy dessert. And here it is!

Jello + Cool Whip + Refrig = Easy Peasy.

It's not "natural" (have you seen what's in Cool Whip?) but kids love it and there is something nostalgic about Jello.

Christmas Cool Whip Jello
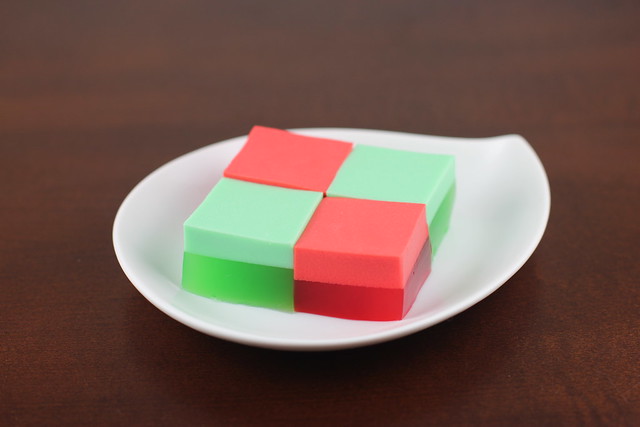
I made this before as Orange Creamsicle Jello. This time, I made it with Lime and Cherry Jello.

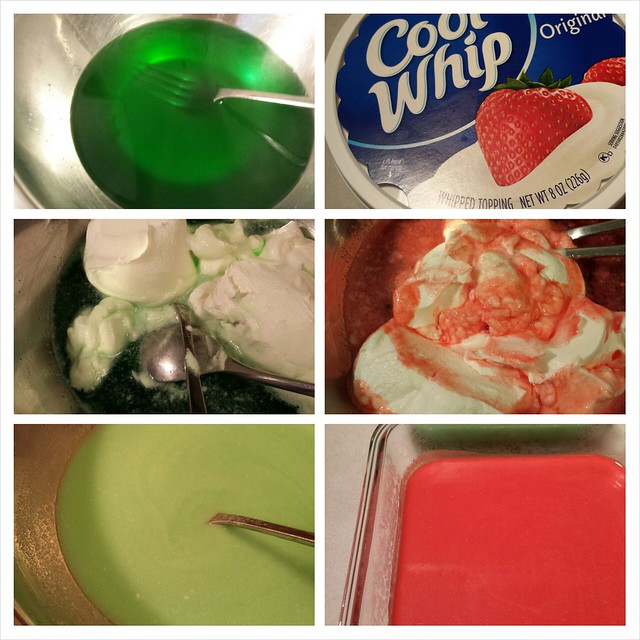
Just dissolve a pack of Jello (using less water than the package says to use so it will be stiffer) and add Cool Whip. Blend to melt and pour into containers. Fridge overnight. Done!

Christmas Cool Whip Jello
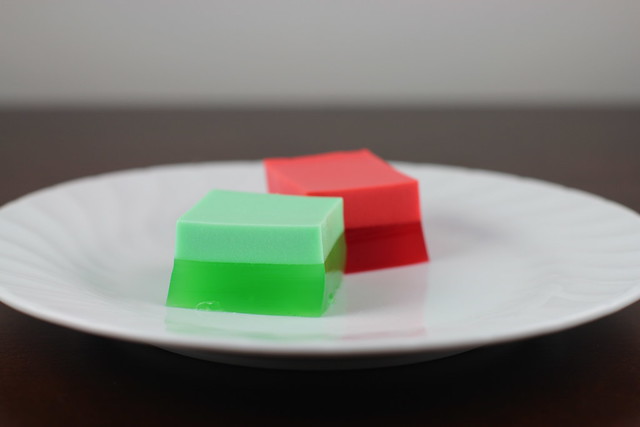
The Cool Whip layer rises to the top while it chills.

Another Christmas Jello recipe you might like is Christmas Broken Glass Jello! You need a little more time for this one, but it is super easy too!!

Christmas Cool Whip Jello
Christmas Cool Whip Jello / Gelatin 

You need to make two batches - one green and one red.

RED or GREEN:
1 cup boiling water
1 small box Green or Red Jello (3 ounces)
1/4 cup cold water
1 cup Cool Whip, thawed

1. Place contents of orange Jello packet in a large bowl. Add boiling water. Stir until completely dissolved.
2. Add 1/4 cup cold water.
3. Stir in 1 cup of Cool Whip. It will melt and dissolve. The mixture will be opaque. It will separate to a two layer Jello as it chills.
4. Pour into pan (I used 4-cup pyrex containers).
5. Chill until firm (preferably overnight) and cut into squares.
Pin It!

The Food Librarian's Kitchen Essentials

Wednesday, December 17, 2014

Kitchen Essentials

Kitchen Essentials (According to the Food Librarian)

I went to Crate & Barrel this weekend for some holiday shopping. The only way I can handle Xmas shopping is at night and with an audiobook playing in my head. Tonight, it was related to the Serial podcast. Have you been listening? So good. (You can find Episodes 1-11 here...and then just binge listen while shopping, driving or baking). Anyway, I heard Episode 11 and I'm just waiting for the last Episode to come out on Thursday. So what's a person to do while they wait? Listen to a podcast of people who are also waiting for the next Serial podcast. I listened to Serially Obsessed for Episode 11. Yes, I'm obsessed too.

Updated to add: Episode 12 was really good...but I want more!

Anywho, sorry that was a long intro/tangent...when I was in Crate & Barrel I came across the most ridiculous gadgets: The Mini Scone pan ($34) and the Butter Slicer ($9). I immediately posted a photo online with the caption:
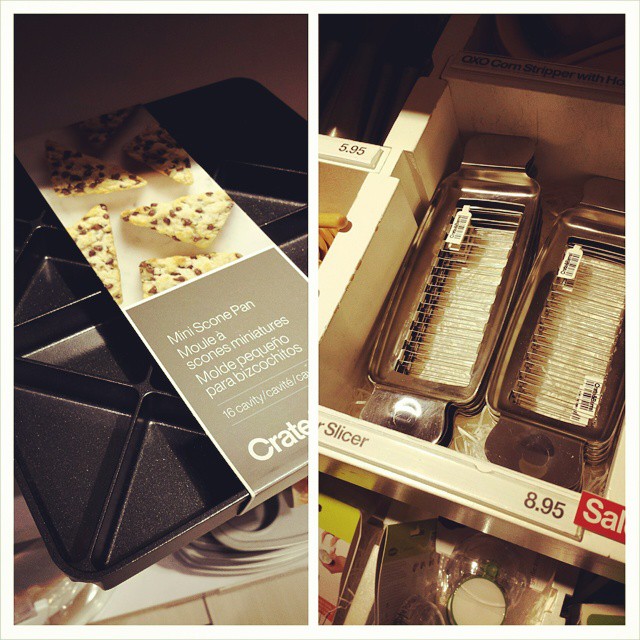
Scone pan $34 and Butter slicer $9. You already own these tools. It's called a knife #ridiculousgadgets #baking #cheapbenchscrapperworkstoo

The Mini Scone Pan and Butter Slicer.
You already have these tools.
It's called a knife.

And it definitely hit a nerve...thank goodness I'm not the only one who thinks these are clutter-making gadgets. Diane and I "talked" (you know, commenting on Instragram photos or via twitter is totally talking), and she mentioned using a bench scraper for these tasks too. I agreed that the bench scraper would totally work and is an kitchen essential. That got me thinking...what else do you need in your kitchen? Here goes:

Essential Practice Must-Have Kitchen Equipment List
AKA The Top 15 Items I would Unpack First If I Ever Moved

1. KitchenAid Stand Mixer
Can't live without this and most cookbooks expect you to have one. It doesn't need to be a fancy one...I've used the basic model for 20+ years.

2. Half Sheet Pans with Lid
Forget cookie sheets, these half sheet pans are so versatile. You can make thin sheet cakes like Texas Sheet Cake, cookies, roast chicken breasts, roast vegetables, and use them as a tray to carry stuff at dinner. Getting a few lids is helpful too! You can stack them in the fridge and they aren't as tall as a traditional 9 x 13 pan. I have about 10 of these in the kitchen so I made multiple trays of cookies without having to cool off and wash them between batches.

3. Parchment Paper Pan Liner for the half sheet pan (pre-cut)
These are so great. I buy them at a restaurant supply place in boxes of 1,000 sheets. You can use them on the half-sheet tray for cookies, fold to line a 9 x 9 square pan so it makes a sling (for easy removal of your brownies), sift ingredients onto the parchment and then pour it into the KitchenAid mixer slowly, and So Much More. I'm not a fan of the Silpat because you have to wash it, and the parchments are disposable and easy to use.

4. Bench Scraper (this one by Oxo has a comfortable handle) but this cheaper wood handle bench scraper works too.
You can cut scones into triangle with this!
You can cut butter with this!
See, I just saved you $43 at Crate & Barrel!

5. Rubber Scraper or Spatula
I get mine at Smart and Final or a restaurant supply place. You might want to mark a set "Baking Only" with painter's tape or a Sharpie. Because they are rubber and/or silicone, they really keep the smells of garlic, at least in my experience.

6. Ice Cream Disher or Ice Cream Scoop of various sizes and the Cookie Scoop
Must haves in the kitchen for dishing out the same size baked goods: cupcakes, drop scones and biscuits, cookies, etc.

7. Kitchen Scale
Make sure it is digital (more accurate reading) and that it can easily switch from grams to ounces (I prefer grams because it is easier to half or double a recipe, but many times you'll need ounces too). It's always faster to weigh the ingredients and it's more accurate!

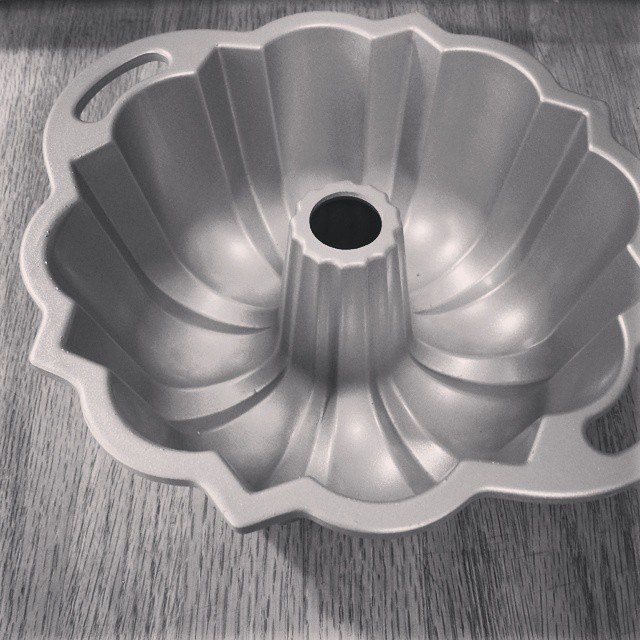
8. Bundt Pan (dude, of course)
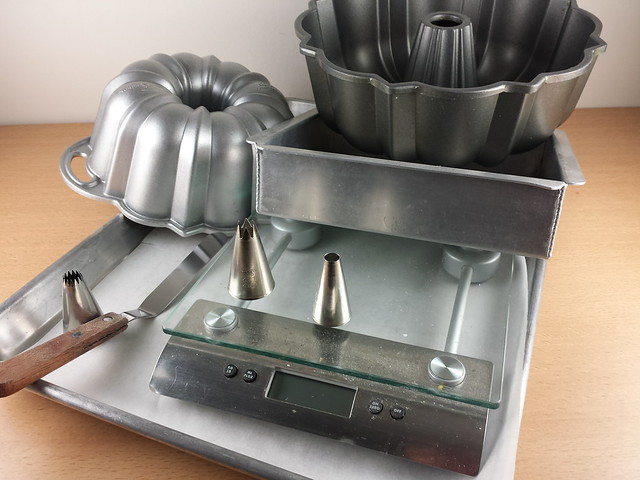
You really only need the basic one (12 cup Nordic Ware Bundt Pan) but you might want to get a fancy one and a 6-cup Bundt too. Read this post I wrote about my collection of Bundts.

9. 8" and 9" cake rounds and 8" and 9" square cake pans
Need rounds for birthday cakes and squares for brownies and snack cakes!

10. 9" x 13" Cake Pan
I like Magic Line's cake pans and their straight edges. They bake evenly too. Read my post about Magic Line.

11. Wire Rack (Half Sheet Size)
These are great because they fit inside a half-sheet pan. They can cool cookies, but you can also lay bacon or kale on it and pop it in the oven.

12. Big Old Sarah Wrap
If you are in the kitchen for any amount of time, I think you need to ditch the hand rolls of plastic wrap in favor of the industrial box. I've used one of these for years and can't image trying to wrap a half sheet tray with a little box. This lasts a long time (my friend is on 5 years, but I usually go through one in about 18 months). I get this one at Costco.

13. Good Vanilla (Nielsen-Massey)
Good vanilla goes a long way to making cakes taste good. I buy this mega bottle.

14. Big Pastry Tips and Disposable Pastry Bags
I like the big pastry tips to quickly frost cupcakes, but a basic set in a box is good too.
This is 100 bags is only $9. You can also get larger 18" bags.

15. Offset Spatula
I own at least 6 of these. Big ones and little ones. They frost. They ease muffins out of the cupcake tray. They get cookies off parchment. They smooth out batter in a pan. They rock.

Bonus: Good Cookbooks
My favorites are by Dorie Greenspan! Buy her latest one - Baking Chez Moi :)

Here are the photos from Amazon of the items I mentioned above. Happy shopping and avoiding the scone tray... :) - mary


P.S. You can get these products at most kitchen supply stores. I used Amazon because they have pictures. Also need to disclose that I'm part of Amazon's Affiliate program so if you buy anything these links, then I get a few cents (doesn't cost you anything and I'll never know who buys what).

Pin It!

Apple Crisp

Tuesday, December 2, 2014

Apple Crisp
Apple Crisp

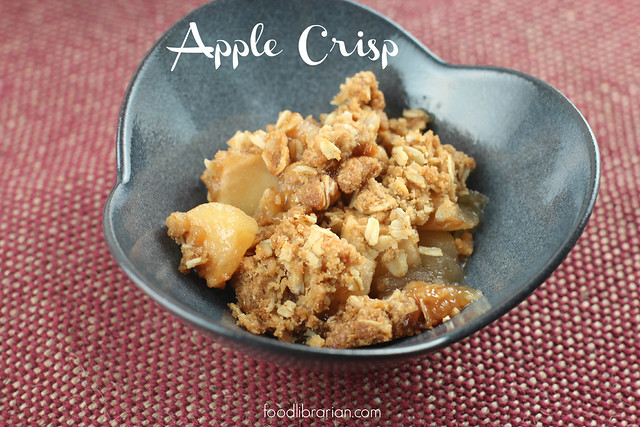
This is the "Scheduled For Thanksgiving Day But Turned Out To Be A Post-Thanksgiving Apple Crisp."

I planned to make this at my parent's house on Thanksgiving Day. After cooking the turkey, I planned to place a fresh apple crisp in the oven and the whole house will begin to smell of apples, cinnamon and sugar. Cue the Hallmark Channel-like food memories. But I was 3/4 of the way to my parent's house and realized I left the topping I made in advance in the freezer.

(Don't worry, I did remember to bring a beautiful Kings Hawaiian Paradise Cake to Thanksgiving so we were fine!)

Thus, this became a Monday Morning Meeting Apple Crisp!

Apple Crisp
I used Martha Stewart Living's Apple Crisp recipe. I wanted one with oatmeal (you know, so we can pretend it doesn't have a stick of butter..."Hey, it has Apples and Oatmeal! Can't be that bad....")

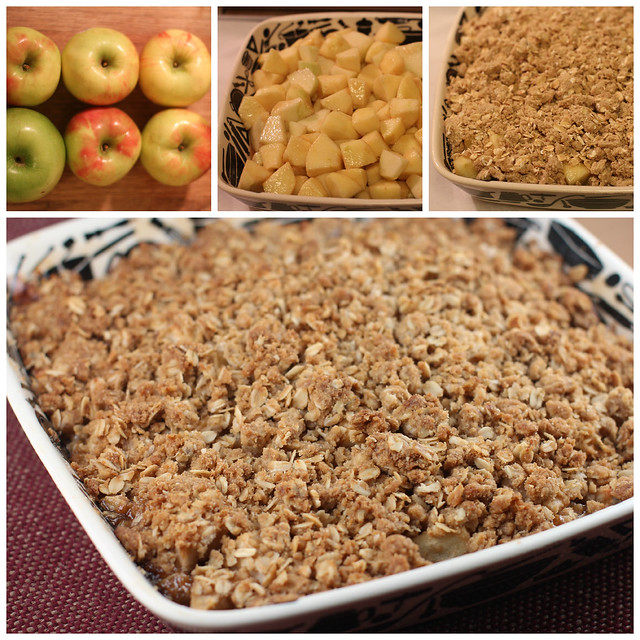
If you can remember to bring the supplies, this is a easy recipe to bake during a dinner party! The house will smell awesome. You can bring a bag of apples, peel and chop them on your host's kitchen, toss with some cinnamon sugar, and top with your pre-made oatmeal and butter topping.

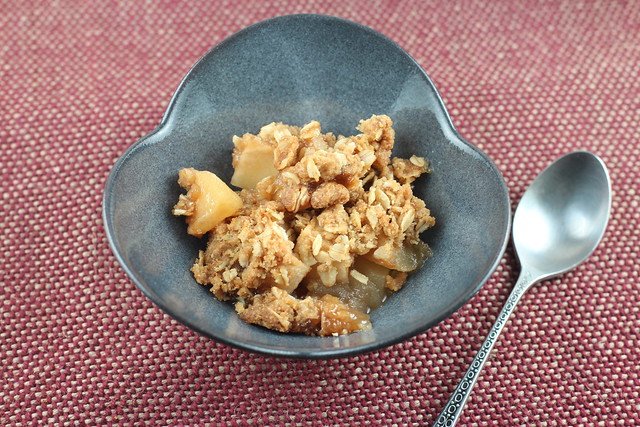
Apple crisp for our meeting this morning. Six people ate 90% of this in an hour. Thank you Thanksgiving for expanding our tummies.
I brought this to the meeting yesterday, and six of us ate 90% of it in one hour. Luckily, Thanksgiving eating has expanded our tummies! :)

It's very versatile...next time, I think I'll use a mixture of apples and pears...and maybe toss in a few cranberries!

Apple Crisp

Recipe: Apple Crisp
Adapted from Martha Stewart Living

Topping:
3/4 cup flour
1/4 cup packed light brown sugar
1/2 teaspoon salt
2 tablespoons granulated sugar
8 tablespoons (one stick) unsalted butter, diced into cubes
1 cup old fashioned oatmeal (not quick cooking)

Apple Filling:
3 pounds apples, peeled, cored and cut
2 tablespoons fresh lemon juice
1/2 cup granulated sugar
1/2 teaspoon ground cinnamon

1. Preheat oven to 350 degrees.
2. Make the Topping: In a large bowl mix together flour, sugars, and salt. Cut the butter into the flour using a pastry blender, two knives, or your fingers until the mixture has pea-sized butter pieces. Add the oatmeal to the bowl and use your hands to squeeze the mixture together until large moist chunks form. Place the topping in the freezer to chill while you prepare the filling.
3, Make the Apple Filling: Peel, core and cut apples into chunks. Place in a large bowl and toss with lemon, cinnamon, and sugar.
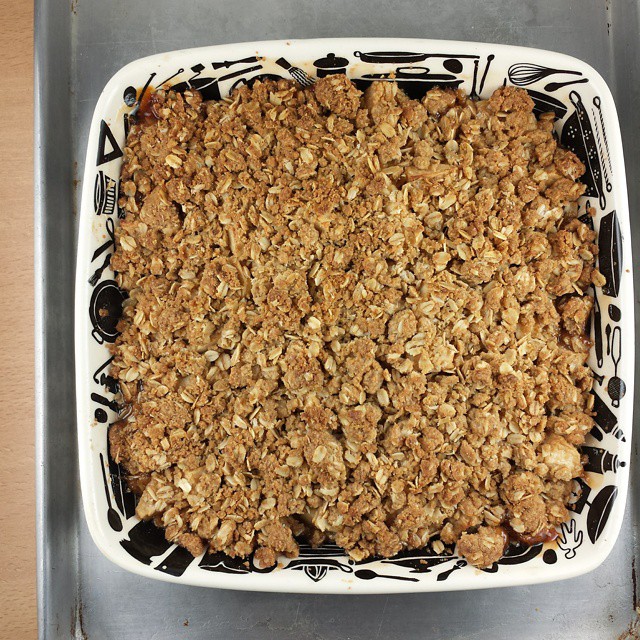
4, Butter a 2-quart baking dish. Place the apple mixture in the baking dish (including any juices) and top with the oatmeal topping. It's best to place the baking dish on a parchment lined baking sheet in case juices overflow. Bake until the top is golden brown and you can see apple juices bubbling underneath. Depending on the size of your pan, this could be from 50-65 minutes. Let cool at least 10 minutes before serving so the juices have a chance to firm up. Serve by itself or with whipped cream or ice cream. It's great served warm from the oven or microwaved it a bit before serving.
Pin It!

Cranberry Crackle Tart - Tuesdays with Dorie - Baking Chez Moi

Tuesday, November 25, 2014

Cranberry Crackle Tart

This tart is the reason I love Tuesdays with Dorie.

It has meringue.

You might think I'm excited about the recipe because I love meringue.

But it's quite the opposite. I hate meringue. (It's this sweet, sticky cloud that gets in the way of the lemon filling in a lemon meringue pie). And that's why this group is awesomesauce.

Tuesdays with Dorie makes you bake things outside your taste and comfort zone. If you know me, you know my comfort zone is Bundt cakes, scones, muffins, and Jello. Never, ever meringue. But since this is Recipe #2 of Tuesdays with Dorie/Baking Chez Moi edition, it was time to settle in and get those eggs to room temperature to whisk, whisk, whisk!

By the way, I'm so excited to see so many friendly faces from the first round of Tuesdays with Dorie!! This is a fun baker's reunion! And I'm looking forward to meeting the new faces too! :)

Cranberry Crackle Tart
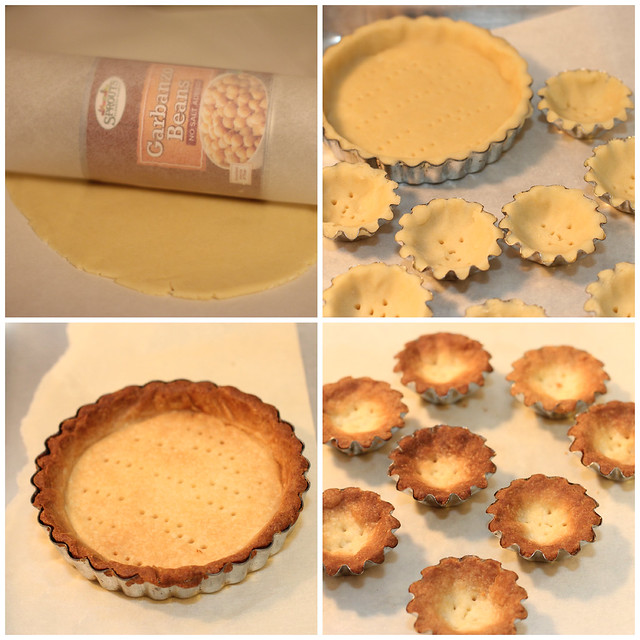
First, you make sweet tart dough and put it into the tart shell or pie tin. Um, I seem to have moved my rolling pin someplace very very safe and secret...and can't seem to find it. So, garbanzo beans to the rescue! Yes, I was even too lazy to get out the step stool to grab the bottle of vodka on the top shelf of the cabinet!

Dorie reveals her new technique - that I LOVE. Instead of making the dough, forming into a disc and chilling it for a couple hours, THEN rolling it out (which is a pain because it is hard and cold).... Dorie now makes the dough, forms it into a disc and rolls it out between sheets of parchment paper while still soft! Brilliant! She does chill the dough in the pie or tart shell before baking or using it.

Cranberry Crackle Tart
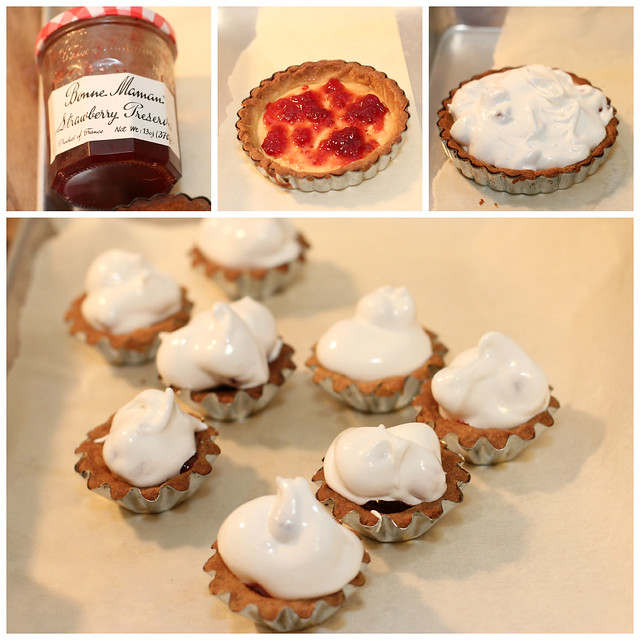
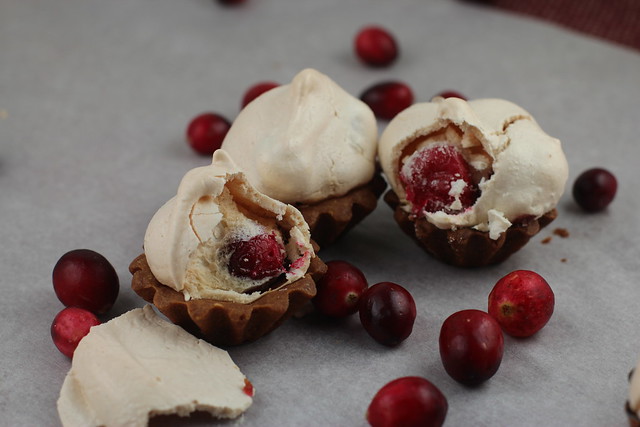
I made a 4" tart and a few mini tarts (I used 1/2 a recipe of sweet tart dough). I did make a two egg white meringue and tossed some of it because I know it is difficult to whip up just one egg white - at least two eggs work better.

A layer of jam is placed at the bottom of the shell and the meringue with cranberries it layered on top.

My tart shells got a little too brown, but they were tasty!

Cranberry Crackle Tart
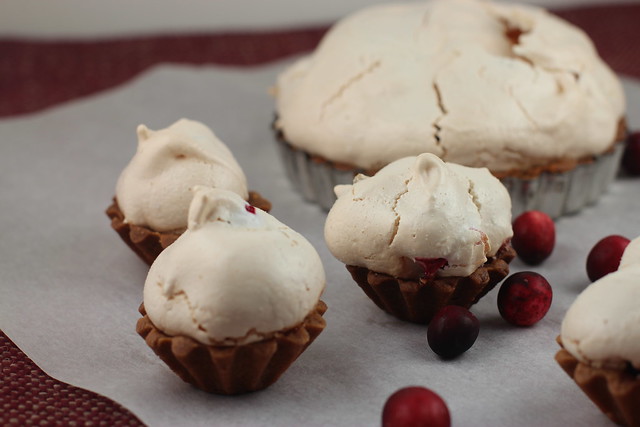
The tart bakes at 300 degrees for an hour (mine baked for less time because they were smaller).

Cranberry Crackle Tart
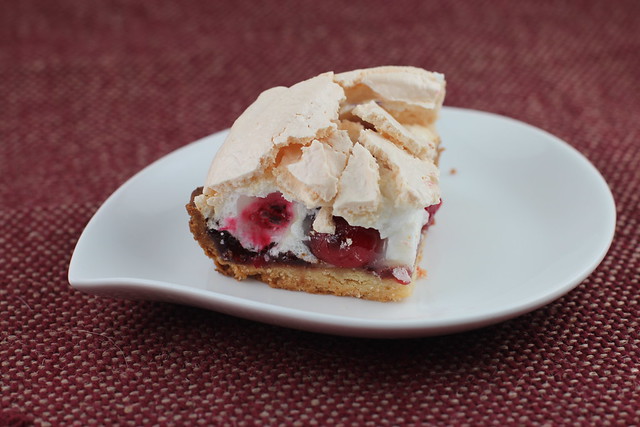
I'm not sure if this is how the meringue is supposed to turn out. The crackle top was tasty, but, as I said before, not a fan of the meringue so I didn't care for the eggy middle. I did enjoy the added cranberries - that was a tart treat amid all that meringue.

Cranberry Crackle Tart
The mini minis had very little eggy meringue inside and were mostly crackle crunch (so I liked them best!).

We aren't publishing the recipes on Tuesdays with Dorie...but this recipe happens to be online at The Splendid Table and on Dorie's website.

Check out the other Tuesdays with Dorie bakers and their creations here!

Happy Thanksgiving! - mary the food librarian
Pin It!

Gingerbread Molasses Scones

Wednesday, November 19, 2014

Gingerbread Molasses Scones

I'm finally acknowledging that it's fall. Los Angeles is filled with Santa Ana winds (which translates into very hot, dry conditions) and no rain ever (huge drought). By the way, all those covered in snow? California will totally trade you some sunshine for some of your snowpack! :) Now that I see Christmas lights on homes (still too early), I'm finally starting to believe that it really is fall and Thanksgiving is only a week away.
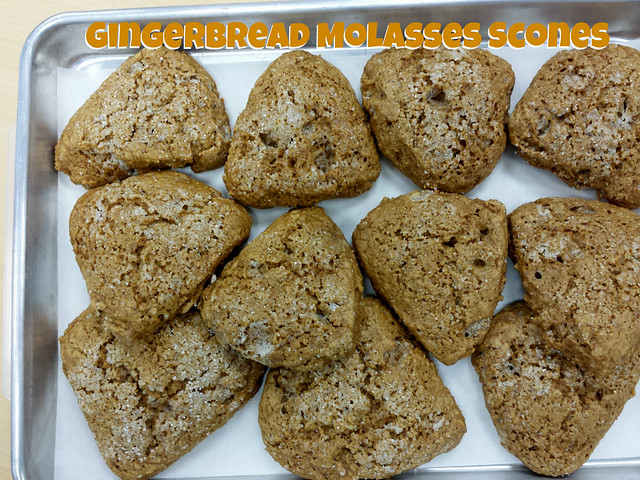
So, to celebrate fall and all its wonderful spices, here are some gingerbread scones.

I found this recipe on the Grandma's Molasses website. It only uses 1/2 stick of butter and regular milk, so it is "lighter" then the usual cream and hella butter scones (not that these scones are health food, but I have a baking blog so what do you expect?!) ;)

Sorry for the photos, I had to use my cell phone and it was dark in the kitchen.

Gingerbread Molasses Scones
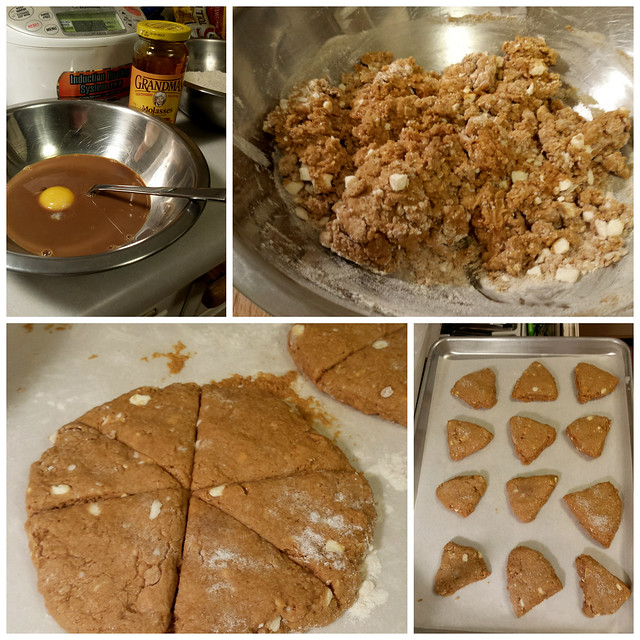
The flour, sugar and spices are combined in a large bowl, and the cold butter is cut into the flour.

In a separate bowl, the molasses,milk and egg yolk are combined. The liquid and dry ingredients are quickly combined until just moistened, and then the dough is kneaded a few times. I should have kneaded mine a little more on the floured surface, because my dough was a little too wet.

The original recipe calls for one circle cut into 12 wedges. I made two circles and cut each into six wedges. (Those white pieces in the dough are small pieces of butter)

A quick brush egg white wash and a sprinkle of sugar completes the scone. The original recipe uses granulated sugar, but I substituted sanding sugar for a little extra crunch.

These were a hit with my coworkers at our morning meeting. Next time, I might add some diced crystallized ginger. I hope you make some for your friends and family this autumn.

Gingerbread Molasses Scones
Adapted from the Grandma's Molasses website (Their scones are much lighter colored compared to mine)

2 cups (280 g) flour
3 tablespoons (38 g) brown sugar
2 teaspoons baking powder
1 teaspoon ground ginger
1/2 teaspoon ground cinnamon
1/2 teaspoon baking soda
1/2 teaspoon kosher salt

1/4 cup cold butter (1/2 stick)

1/3 cup molasses (Grandma's recipe uses the Robust Molasses, but I used the Original Molasses)
1/2 cup milk (I used low-fat milk)
1 egg yolk

Topping:
1 egg white
Sanding sugar or granulated sugar

Preheat oven to 400°F.
1. In a large bowl, whisk together the dry ingredients.
2. Cut butter into dry ingredients using to knives, pastry cutter or your fingers until butter is the size of peas.
3.  In a medium bowl, combine the molasses, milk, and egg yolk until blended.
4. Add the molasses mixture to the dry ingredients, and stir with a fork until just moistened.
5. Turn the mixture onto floured surface and knead 6 - 8 times. Form the dough into a circle. I divide the dough into two balls and made two circles. Cut into wedges. I cut each of my circles into six wedges for a total of 12 scones.
6. Beat the egg white until frothy. Brush the scones with the egg white, and sprinkle with sanding sugar.
7. Bake at 400° for 12 to 15 minutes, until lightly golden brown.

Pin It!

Happy National Bundt Day 2014

Saturday, November 15, 2014

Happy National Bundt Day 2014!

Wishing you and yours a lovely National Bundt Day. I hope you make and share a Bundt today with your friends, family and co-workers. That's what the day is all about - baking and sharing!

Good morning dear friend. Wishing you a lovely #nationalbundtday! I didn't have time for #ilikebigbundts this year, but I hope you find time to bake & share a #bundt today. That's what the day celebrates...baking and sharing! Need a recipe? A boatload are

Happiness is a chocolate cinnamon#bundt! #nationalbundtday #ilikebigbundts #baking

I made my favorite Chocolate Cinnamon Bundt this morning and will deliver it tonight to friends! (I hope I can hold out that long...my friends won't mind if there was a small piece missing :)

If you need recipe ideas, you can find some under the I Like Big Bundts page. Take care and Happy Bundt Day!


Pin It!

Palets de Dames - Tuesdays with Dorie Baking Chez Moi

Tuesday, November 11, 2014

Palets de Dames - Tuesdays with Dorie

Hello. Good morning!
It's Tuesday.
And since it's Tuesday, I'm happy to say it's Tuesday with Dorie Day!

In May 2007, I started this blog to learn how to bake from scratch and drop the cake mixes.

After I started baking, I learned about a group of bakers who were baking their way through Dorie Greenspan's cookbook, Baking: From My Home to Yours. I joined in 2008 and then spent the next few years not only baking many things I might not have made if weren't it for the group, but I also met lots of friends along the way.

Dorie has a new wonderful book Baking Chez Moi: Recipes from My Paris Home to Your Home Anywhere and it's time to try to bake my way through this one as well.

The Tuesdays with Dorie group will be making two recipes per month and I hope I can keep up with that schedule. Please visit the Tuesdays with Dorie website and take a look at all the bakers who baked the recipe of the week. And if you're a baker, I hope you join in the fun and bake with Tuesdays with Dorie too. The cookbook is so lovely and I hope we can bake together. Please note that we will not be publishing the recipe on our blog posts, as we want to support Dorie and encourage everyone to purchase her beautiful cookbook.

Palets de Dames - Tuesdays with Dorie


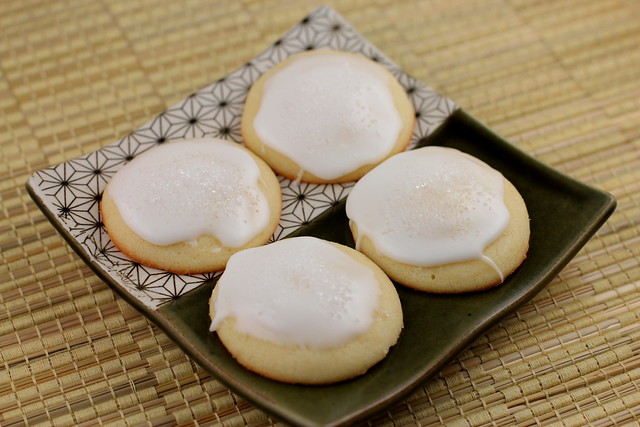
The first recipe is Palets de Dames. These are sweet little butter cookies with a glaze of powdered sugar. They are cakey cookies and are perfect with coffee or tea. You can tint the glaze if you want to suit the occasion, or use sanding sugars to give it an extra sparkle or color - or do both!

Palets de Dames - Tuesdays with Dorie
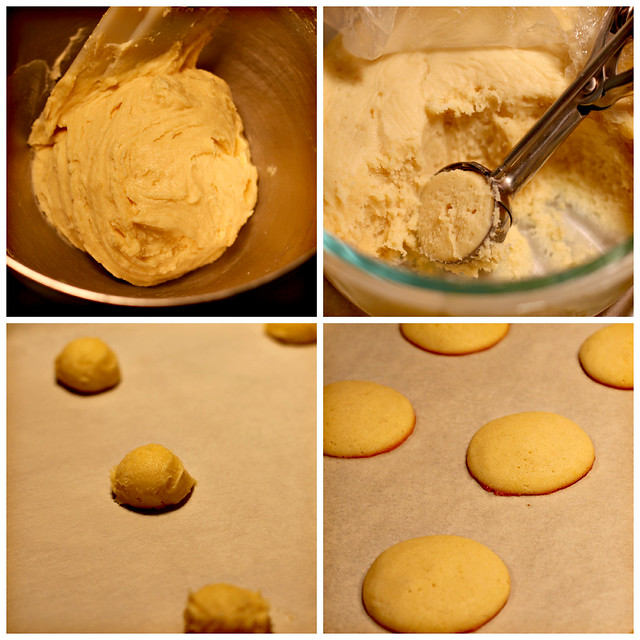
These cookies are a perfect start to the group because you're quite easy to make. Simply creaming together butter, sugar, eggs and adding just a bit of sifted flour makes the base. When you make these, plan your time because you need to chill the dough for at least one hour or overnight before baking.

Aren't these really cute and sweet? Only bake them until the edges are lightly browned.

Palets de Dames - Tuesdays with Dorie
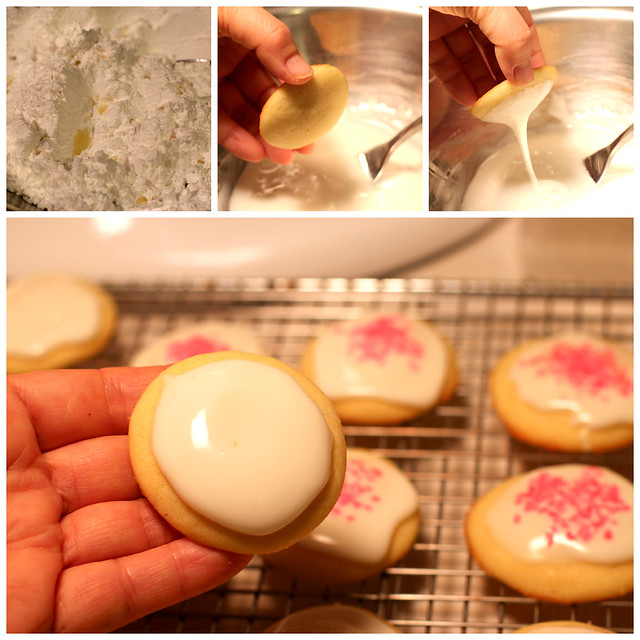
After the cookies cool, an easy glaze of powdered sugar milk and a few drops of lemon juice (I substituted orange juice because I was out of lemons) is made, and the cookies are dipped in the glaze. I topped some of mine with sanding sugar - clear and pink.

I'm looking forward to another round of Tuesdays with Dorie. I see some old friends already (Di, Katrina, Alisa, Jules, Audrey, Cathy...) - I'M SO HAPPY TO SEE YOU GUYS!!! It's like a bakers reunion!

And I look forward to meeting more "baking interwebs" folks. See this post for links to other baker's posts.

- mary the food librarian

P.S. Dude, buy the book. It's fantastic! Like, crazy fantastic. And it makes the perfect holiday cookbook gift!

P.S.S. If you are new to my blog, I haven't been blogging much lately, but you can always find me on Instagram and Twitter @foodlibrarian


Pin It!

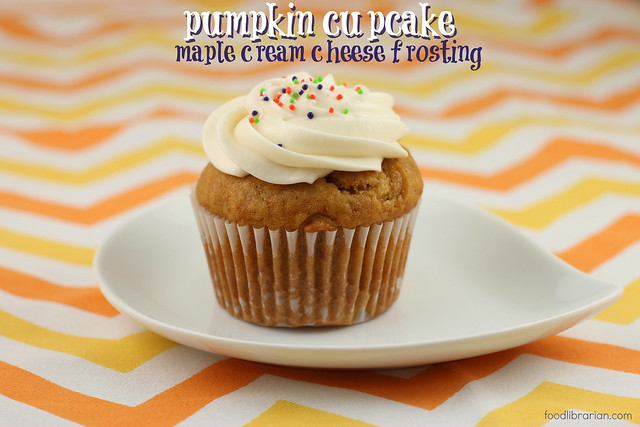
Pumpkin Cupcake with Maple Cream Cheese Frosting

Tuesday, October 28, 2014

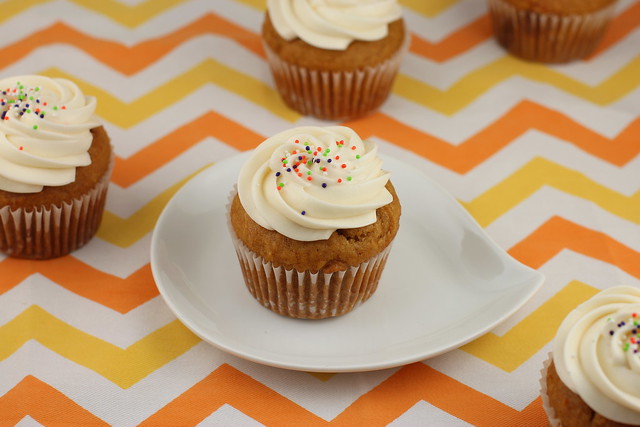
Pumpkin Cupcakes with Maple Cream Cheese Frosting
Pumpkin Cupcake with Maple Cream Cheese Frosting

Oh, Pumpkin. The best time of the year.
Well, until Peppermint season comes around.
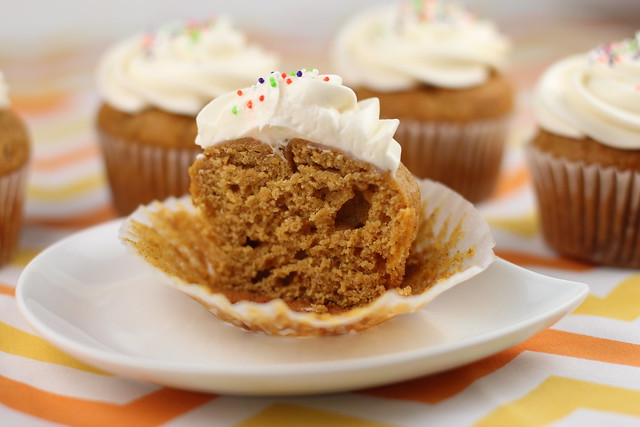
So, let's enjoy pumpkin season with these "Pumpkin Snack Cake baked in Cupcake cups and topped with Maple Cream Cheese Frosting." Kinda a long name, but that's what this is. It's not a true cupcake (which I feel should be lighter) - it's has a denser consistency. Not that that's bad! I love snack cakes...thus, with the muffin/snack cake texture, this is perfect 24 hours/day - including breakfast!

Pumpkin Cupcakes with Maple Cream Cheese Frosting
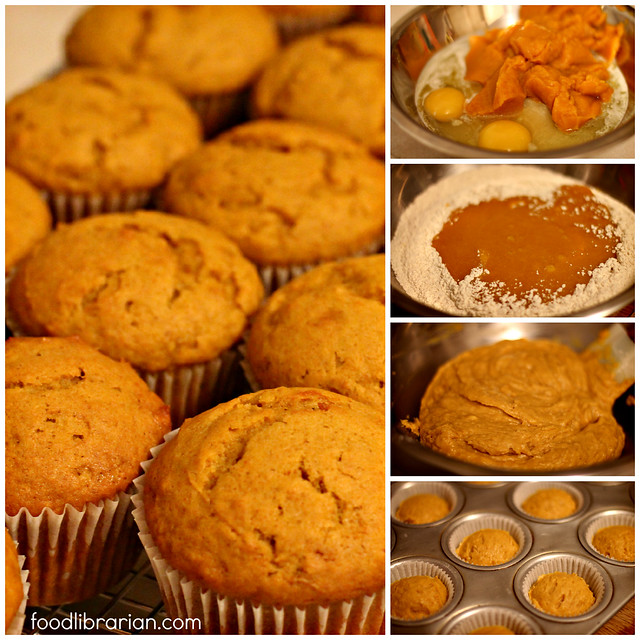
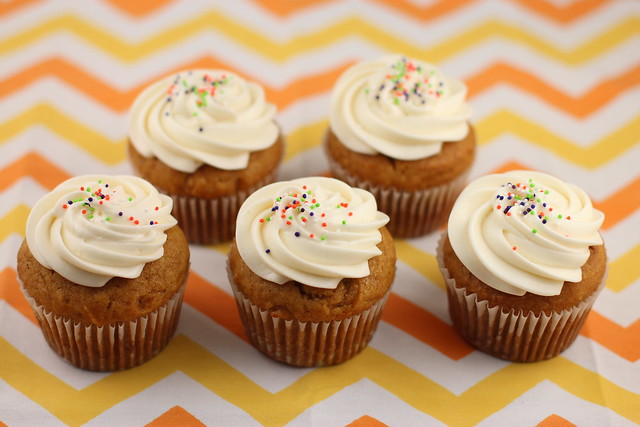
This cake uses a whole can of pumpkin - very pumpkin-y flavor. I've made it as a snack cake, but the cupcakes are easy to bake and serve. And they look all pretty!

The recipe is adapted from Everyday Food from the Martha Stewart empire (I really miss this cooking magazine) and it was baked on the PBS Everyday Food show back in the day.

Pumpkin Cupcakes with Maple Cream Cheese Frosting
The consistency is more snack cake/muffin. I like that in a pumpkin cake - you should taste and feel the pumpkin!

Pumpkin Cupcakes with Maple Cream Cheese Frosting
I made a Maple Syrup Cream Cheese Frosting. The original recipe had honey but I used maple syrup instead and added some powdered sugar to stiffen it so it was "pipeable" (that's totally a word, right?)

A lot of non-bakers don't believe me, but it is so much faster to pipe frosting with a big tip than spread it with a butter knife or offset spatula. I use disposable plastic piping bags and that makes it super easier.

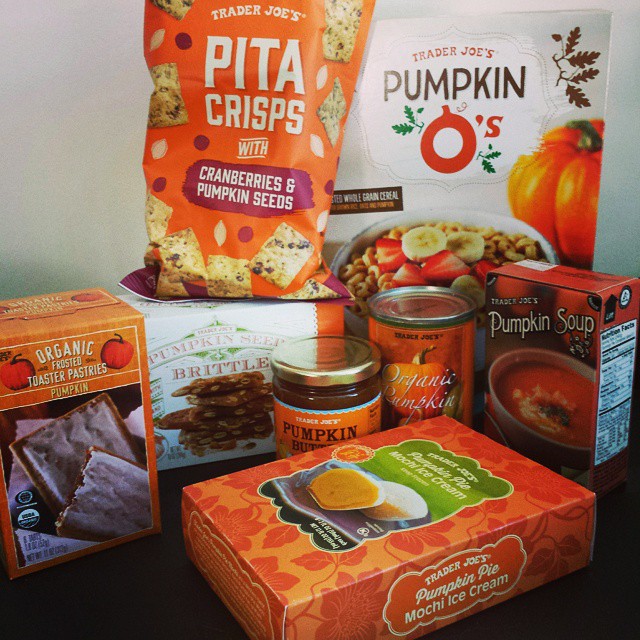
My happy Trader Joe's #pumpkin haul: O's, pita chips, mochi, butter, brittle, canned, pop tarts
As you can see, I'm kinda crazy about pumpkin and Trader Joe's is too! Have you tried the Pumpkin O's? I'm addicted. And that Pumpkin Brittle? OMG. So good. To tell the you truth, I was going to break off pieces of the brittle and put it on the frosting...but I didn't want to use all the brittle! (sorry co-workers). I love the Pop-Tarts and Pumpkin Butter every year. Oh, and the Pumpkin Mochi Ice Cream? YUM. The Pita Crisps aren't life changing - I'm going to skip them next time. I haven't tried the soup yet.
Pumpkin Cupcakes with Maple Cream Cheese Frosting
Celebrate Pumpkin Season by making these pumpkin treats!

Pumpkin Cupcake with Maple Cream Cheese Frosting
Adapted from: Everyday Food Pumpkin Spice Cake with Honey Frosting

1/2 cup (1 stick) unsalted butter, melted
2 1/2 cups (350 grams) all-purpose flour
2 teaspoons baking soda
1/2 teaspoon salt
1 tablespoon pumpkin-pie spice (I used Trader Joe's Pumpkin Pie Spice). The original recipe says you can also use: 1 1/2 teaspoons cinnamon, 3/4 teaspoon ginger, 1/2 teaspoon nutmeg, and 1/8 teaspoon each allspice and cloves)
2 large eggs
1 1/2 cups (300 grams) sugar
1 can (15 ounces) solid-pack pumpkin puree (I used Trader Joe's organic pumpkin puree)

Frosting
1 stick (4 ounces or 1/2 cup) butter, softened
1 block (8 ounces) cream cheese, softened
1 cup powdered sugar
3 Tablespoons maple syrup

1. Preheat oven to 350 degrees. Prep muffin tin with liners. I got 17 muffins from this recipe. (Original recipe bakes in a 9-inch square pan).
2. In a large, whisk together flour, baking soda, salt, and spices.
3. In a medium, whisk together eggs, sugar, butter, and pumpkin puree until combined.
4. Fold together the wet and dry ingredients until combined. Don't overmix.
5. Fill muffin cups. I use an ice cream scoop.
6. Bake until a toothpick inserted in center of cake comes out clean. 25-30 minutes. Cool completely before frosting.

Frosting
1. In a mixer with paddle attachment, cream the butter and cream cheese together until well blended.
2. Add maple syrup and powdered sugar and blend until smooth.
3. Pipe or spread on the cupcakes.
Pin It!

Make your own Frozen Steel Cut Oatmeal

Tuesday, October 21, 2014


Steel Cut Oatmeal
Steel Cut Oatmeal

Everyone knows that eating oatmeal is a great, healthy way to start your day. I really like steel cut oatmeal but it takes a long time to make (about 20-30 minutes I don't have in the morning). So, when I saw Trader Joe's frozen steel cut oatmeal package in the freezer section, I had to give it a try. It's very convenient but the portion size is a little too much for me. The package is under $2 for two, but I knew I could make it for a lot less money - oatmeal is one of the most inexpensive (but good for you) foods!

So, off to make the frozen oatmeal!
And I did make it. (And make it regularly)
And I planned to blog about it.

That was over 2 years ago.

I forgot I took these pictures of the process and never posted it! So, here is a blog post two years in the making. I recently took more photos of the process so this is a combo of two sessions.

Frozen Steel Cut Oatmeal
Trader Joe's sells these two packs of frozen Steel Cut Oatmeal for under $2.00 Not bad, but I knew I could make them cheaper and smaller (I can't eat this much oatmeal as I also eat fruit and yogurt in the morning). It's lightly sweetened with maple syrup and brown sugar. By making it yourself, you can control the sweetness and add other stuff like agave syrup or whatever else you want.

Trader Joe's also has one that combines oatmeal with quinoa...you can always make that too!
Frozen Steel Cut Oatmeal
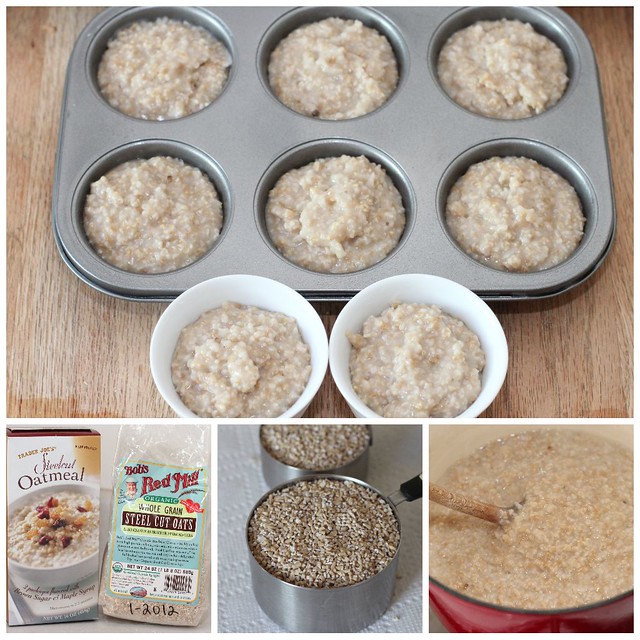
The process is simple - just make more oatmeal than you would normally eat in one sitting and freeze the rest in portions.

I used Bob's Red Mill Steel Cut Oats. (As you can see, I've had this photo for a long time...don't worry, the oats weren't expired). The ratio is 1 cup of oats to 3 cups of water. Cook to taste and preferred consistency: 10 - 20 minutes. You need to make sure you are stirring the simmering bowl frequently. I add some maple syrup at the end of the cooking process. You can also add brown sugar, agave or honey too - or leave out all sweeteners and add it when you eat it later.

Lately, I've been purchasing the Steel Cut Oats from the bulk bin at Sprouts market - only 99 cents per pound (gives you over a cup of oats). Can't beat that price!

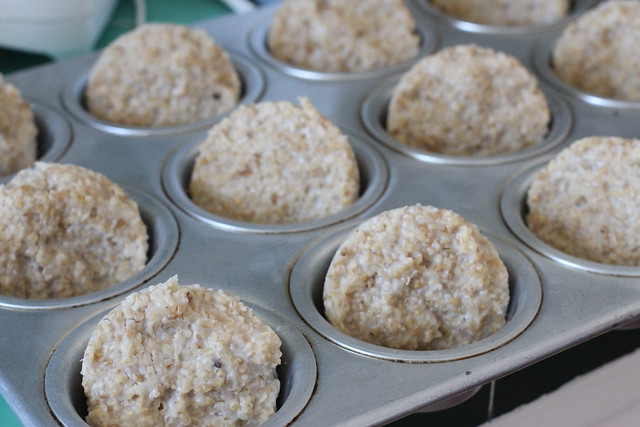
When the oatmeal is ready, I ladle it into a greased muffin tin. The photo above has a jumbo muffin tin, but I also use a regular muffin tin. Depends on your appetite! If I'm super hungry, I'll nuke two of the "regular muffin tin" pucks. Again, you know what portion you like. Whether you use the jumbo or regular, it WILL have a smaller volume than the Trader Joe's frozen oatmeal. You definitely get enough fiber with the Trader Joe's size oatmeal!

Steel Cut Oatmeal - Making & Freezing
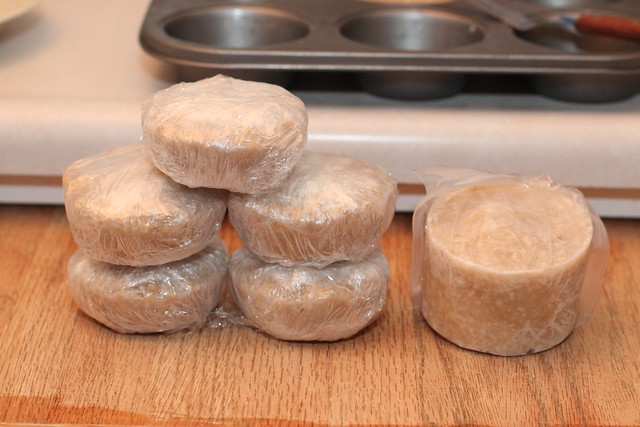
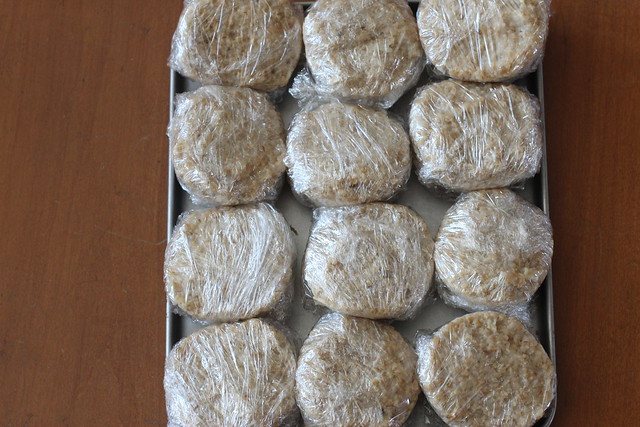
After a chill in the refrig, scoop out the solid masses of oatmeal and individually wrap in plastic wrap. (This is a regular muffin tin batch).

Steel Cut Oatmeal - Making & Freezing
Once they are wrapped, I put them in the freezer. After they are frozen solid (overnight), I take the pucks and put them in a freezer bag. Grab one in the morning, nuke it and boom! Breakfast!

Steel Cut Oatmeal - Making & Freezing
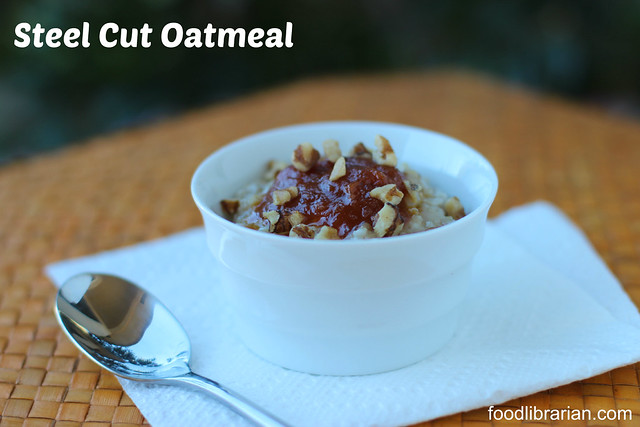
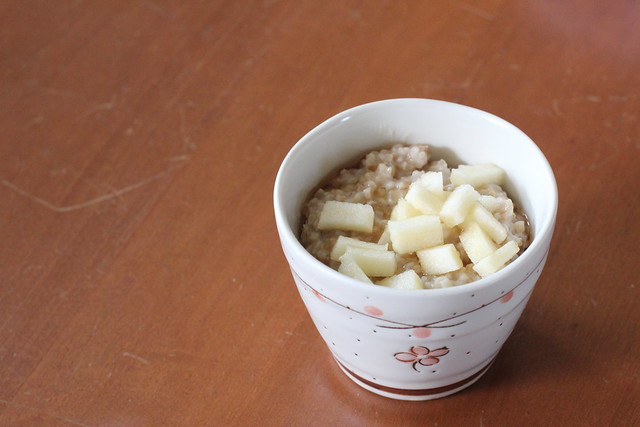
In the first photo, the Steel Cut Oatmeal is topped with Pumpkin Butter and nuts. This one has a bit of maple syrup and diced apple.

Frozen Steel Cut Oatmeal
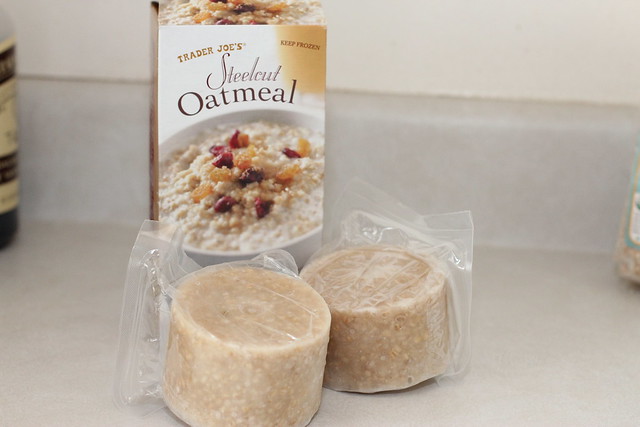
On the left: Homemade frozen oatmeal. (Smaller portions, nuke one or two in the morning)
On the right: Trader Joe's vacuumed packed steel cut oatmeal "puck".

Frozen Steel Cut Oatmeal
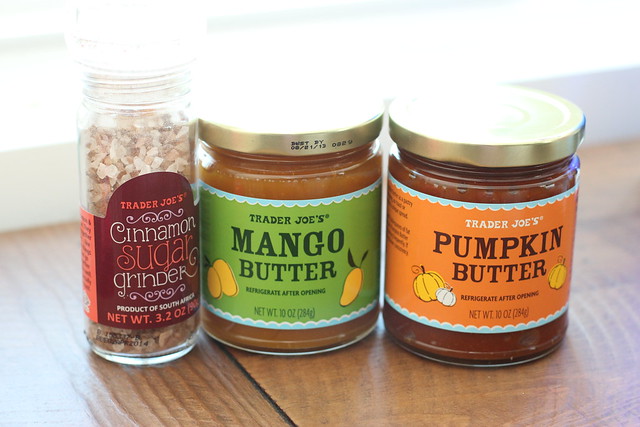
I love, love these toppings for the oatmeal. Trader Joe's cinnamon sugar grinder, Mango butter and the best...Pumpkin Butter!

I hope you give making homemade Steel Cut Oatmeal a try! It's super delicious on cold mornings.

Recipe:

Frozen Steel Cut Oatmeal

1. Cook steel cut oatmeal according to the directions on the package. Or bring 3 cups of water to boil, add 1 cup uncooked oats and stir. Reduce heat to a simmer and stir occasionally. Cook for 10-20 minutes - until desired texture. Add sweeteners if you want.
2. Scoop hot oatmeal into greased muffin tin and allow to cool. Refrigerate until cold.
3. Remove pucks from tin and wrap in plastic wrap. Freeze solid in freezer.
4. When you are ready for oatmeal, unwrap one or two pucks and microwave (time depends on how many packets you are heating - I usually start with 1 minute, then stir and nuke again until hot). Depending on how water you cooked out of the oatmeal, you may need to add a few drops of water to the puck when microwaving.
5. Top with fruit, fruit butters, maple syrup, nuts, cinnamon, nutmeg or anything else you fancy!
6. Get dressed, grab your lunch and head off to work or school! :)

Pin It!
Blog Widget by LinkWithin